There is a popular quilt, called the "Sealed With a Kiss (SWAK) Envelope Quilt", whose blocks are cute little envelopes made from fabric. Each envelope is exactly like a paper envelope, suitable for tucking treasures inside for a child to find. This quilt was designed by Nancy Smith & Lynda Milligan and is featured in their book, Hearts Aplenty. Their quilt was featured on Simply Quilts, episode QLT-732. At one time, I had viable links to both the Simply Quilts episode and to Lynda Milligan's & Nancy Smith's website. Sadly, both links are no longer active.
This quilt was a topic of discussion on About.com's Quilting Forum, a place I frequently visit and participate in the various conversational threads. One poster, Jane (Canine461) in Monn, Connecticut, commented that she was going to use the blocks as a quilt label and put a note to the recipient inside.
I thought this was an exceedingly clever idea but realized that if the note was separate from the quilt, it inevitably was going to get lost. It occured to me that if the envelope opened up and unfolded, it could be the label with a place to write inside; a separate note would be unnecessary. First, I duplicated the original SWAK envelope block, so I could see how it went together and what the finished version looked like. [Editorial comment: whoever put together the Simply Quilts page on the SWAK block ought to be taken out side and stitched-in-the-ditch as punishment! Maybe you really needed to see the television show to understand the written instructions and the less-than-helpful pictures. To my mind, the directions were not helpful at all. I eventually re-wrote them for myself in a more comprehensible format, should I ever want to make their SWAK envelope block in the future.}
I realized that the SWAK envelope block was totally unsuitable for the idea I had in mind, but I did like the look of their finished block. What I wanted was a quilt label you could write your dedication on but fold up into its own envelope. The envelope quilt label could be made completely independent of the quilt and stitched to the backing by hand after the binding was down ... OR ... it could have one edge permanently sewn into one edge of the quilt, secured by the binding itself; the other edges would then be hand-sewn to the backing.
Below is my creation of the Envelope Quilt Label in 4 versions. The basic envelope calls for one fabric to be both the envelope flap and lower envelope. Variation 1 uses different fabrics for the flap and lower envelope. Variation 2 uses color blocking that mimics the original look of the SWAK quilt block. The last variation shows how to modify the basic envelope quilt label so it can be permanently bound into one of the side edges by the binding, making the label more difficult to remove by thieves. (It is a very sad fact that quilts are stolen. Labels not only document the history of the quilt but obviously show ownership. Labels appliqued on top of a quilted backing is the easiest to remove. Labels that have one or two sides secured by the quilt binding are more tedious to remove. Labels that are quilted as part of the quilt are the most difficult to remove and hence, are the most secure.)
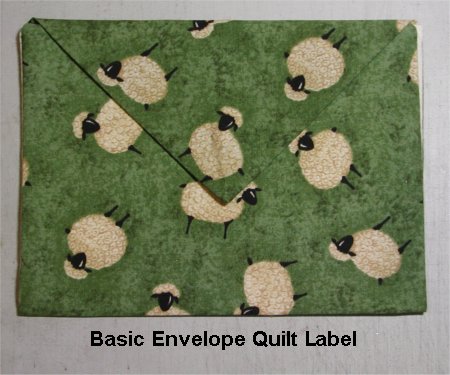
When folded up to look like an envelope, it's a common 5"x7" size. When the lower envelope is opened up, you have a very generous 6"x10" area for writing your presentation sentiments.
The Basic Envelope Quilt Label | |
| Photo for illustration | Directions |
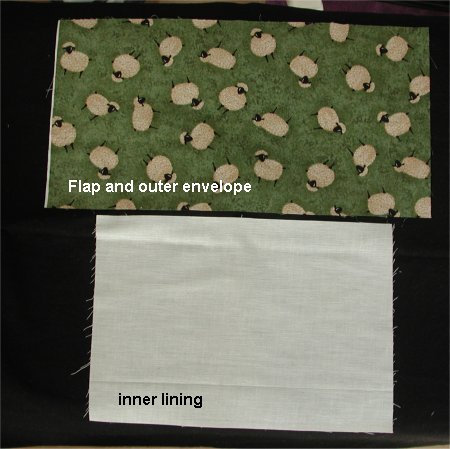 | Preparation. You will need two pieces of fabric: one piece (7-1/2" x 14-1/4") for the flap and outer envelope and one piece (7-1/2" x 10-3/4") for the inside lining. If you intend on writing on or decorating the inside lining, make sure the fabric is a shade that the writing will show up. The finished inside lining will be a generous 6" x 10" writing/decorating area. |
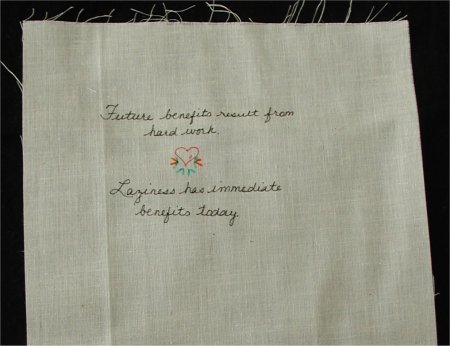 | Step 1. If you intend on writing or decorating the inner lining, stablize it by ironing on a piece of freezer paper to the wrong side. Use a HOT, DRY iron. Use a permanent fabric ink (Pigma and Zig are archival quality brands) to write your sentiments, dedication or verses. Decorations can be done with the aforementioned Pigma and/or Zig pens, rubber stamps & fabric ink, acrylic paint mixed with fabric medium, crayons, embroidery ... in short, any way you wish to create the label itself. In this example, I've used a black Pigma pen to write a pithy comment and colored Pigma pens for a heart and flowers. Remove freezer paper after the label is completed. |
 | Step 2. Fold the outer envelope fabric in half, lengthwise, right sides together. Sew across just one of the short edges with a 1/4" seam allowance. Back sttich on both ends. Trim corner point. |
 | Step 3. Turn right side out. GENTLY poke out the corner (I use a rounded end knitting needle). Fold this corner so the seam is vertically aligned. Press flat. (The raw edge will eventually be covered by the inner lining fabric). |
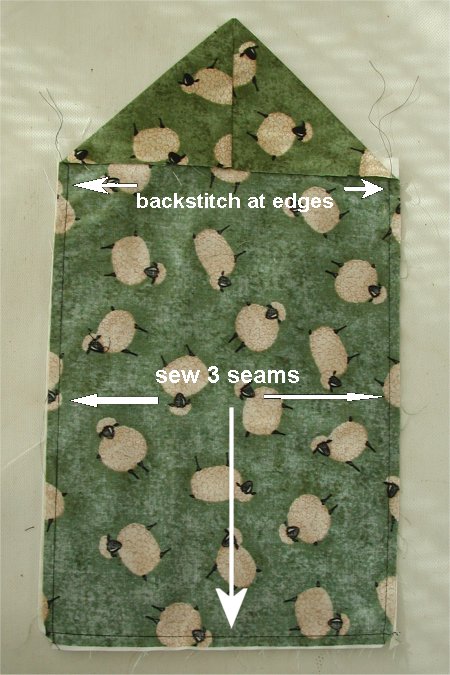 | Step 4. Put lining and outer fabric right sides together, having the bottom and sides even. Sewing a 1/4" seam, start with backstitching along one long side. (Note: I like to sew off the end of each seam and start the next side anew. I don't like to pivot at the corner because a pivot doesn't give you a crisp corner.) Sew a 1/4" seam along the three outer sides. End with backstitching at the other long side. Do not catch the raw edge of the flap. Trim corners. |
| LINK to Pirate's Quilting Home Page | NEXT to the Basic Envelope Quilt Label, page 2. |
Feedback, comments, etc can be sent to Shelley Rodgers at pirate_sr@hotmail.com.