The Basic Envelope Quilt Label | |
| Photo for illustration | Directions |
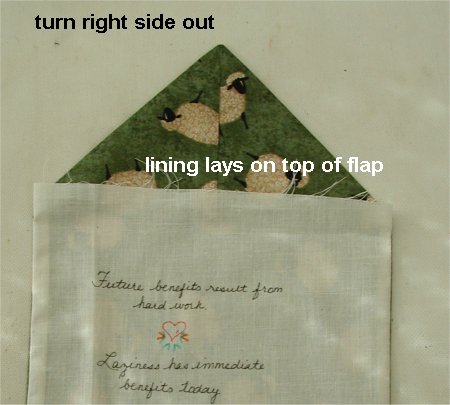 | Step 5. Turn right side out. GENTLY poke out the corners. The raw edge of the lining fabric should cover/lay over the raw edge of the flap. |
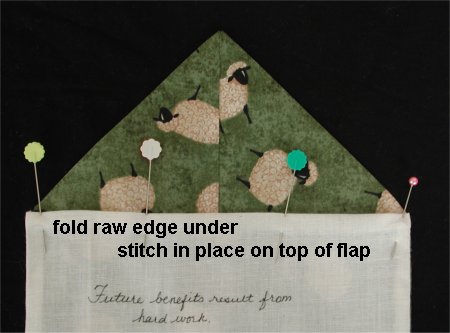 | Step 6. Fold the raw edge of the lining to the inside about 1/4" (more or less). It should cover the raw edge of the flap. Hand or machine stitch the folded edge of the lining to the flap. You can also use a decorative stitch along this edge. For this example, I hand stitched the edge down, using a blind stitch. |
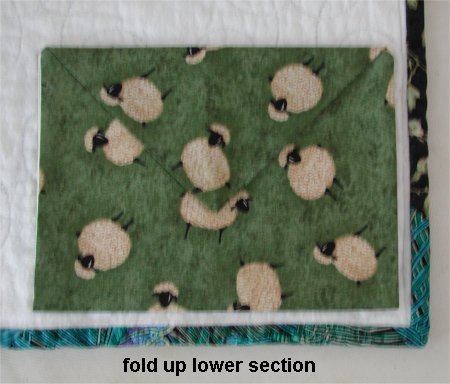
| Step 7. Fold up the lower edge so that the lower edge of the envelope meets the top of the lining fabric. Press flat. Fold the flap down. Press flat. At this point, you can make a buttonhole in the flap and sew a decorative button on the envelope ... OR ... you can sew use snaps (decorative, metal or invisible plastic) ... OR ... some other method of securing the flap to the envelope. (I do not have a photo showing any buttons/snaps/etc .. the flaps in my pictures are loose.) | |
 | Step 8. Put the folded envelope label on the quilt. Hand sew the top folded edge to the quilt. Hand sew the bottom folded edge to the quilt, making sure you can unfold the lower envelope when finished. |
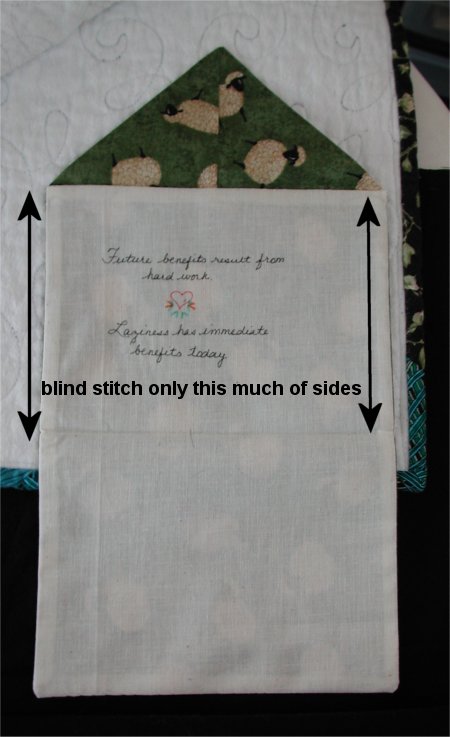 | Step 9. Open up the envelope and hand stitch the middle third sides ONLY to the quilt. Voila! Your envelope quilt label is completed! |
| BACK to the Basic Envelope Quilt Label page 1 | NEXT to Variation 1, which uses different fabrics for the flap and lower envelope. |