The Basic Envelope Quilt Label | |
| This variation can be used with any of the Envelope Quilt Labels. In order to be able to attach the Envelope Quilt Label to the quilt seam allowance when the binding is being applied, you need to have the seam allowance of the Envelope Quilt Label extend from itself, i.e. not have a completely finished edge. The differences from the Basic Envelope construction are described below. | |
| Proceed with the Basic Envelope Quilt Label directions, steps 1 through 3 | |
| Photo for illustration | Directions |
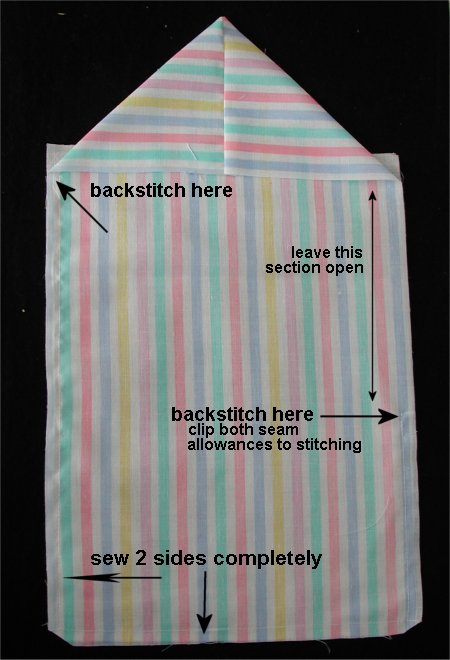 | Step 4 Put lining and outer fabric right sides together, having the bottom and sides even. Sewing a 1/4" seam, start with backstitching along one long side. Do not catch the raw edge of the flap. (Note: I like to sew off the end of each seam and start the next side anew. I don't like to pivot at the corner because a pivot doesn't give you a crisp corner.) Sew a 1/4" seam along the bottom edge. The middle section of the envelope (the back part that goes against the quilt) is about 5" from the edge of the flap to the fold line. Therefore, on the other long side, start the backstitching at the 5" mark and sew to the bottom. Clip both seam allowances to the stiching at the 5" mark. Trim corners. |
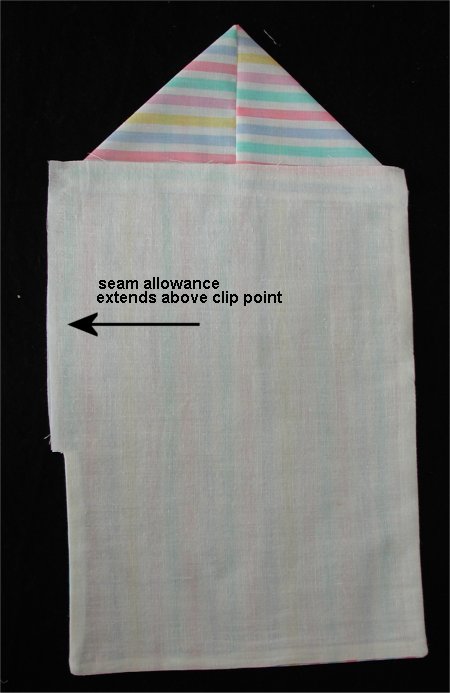 | Step 5 Turn right side out. GENTLY poke out the corners. The raw edge of the lining fabric should cover/lay over the raw edge of the flap. The seam allowance above the clip point should extend beyond the finished edge. |
| Now you can continue with the construction from the Basic Envelope Quilt Label, steps 6 and 7. | |
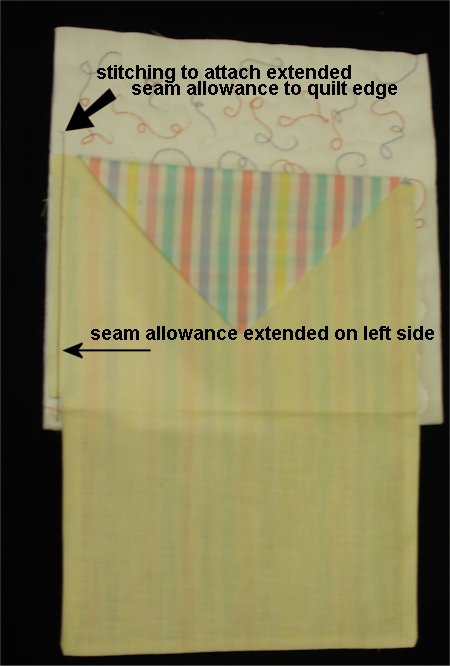 | Step 8 Place the bottom folded edge of the envelope label above where your binding is going to be. The raw edge of the extended seam allowance is even with the side of the quilt. Machine stitch the extended seam allowance to the quilt. |
| Step 8a Bind the quilt with either bias or straight-of-grain tape, as is your preference, being sure to keep the finished edges of the Envelope Quilt Label free from the binding. | |
 | Step 9. Hand sew the top folded edge to the quilt. Open up the envelope and hand stitch the middle third side ONLY to the quilt. |
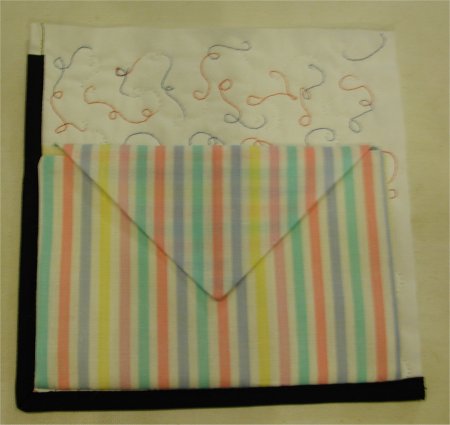 | Step 9a. Fold the Envelope Quilt Label closed. Hand sew the bottom folded edge to the quilt, just above the binding. Voila! Your envelope quilt label is completed! |
| LINK to Pirate's Quilting Home Page | BACK to the Basic Envelope Quilt Label page 4 |