The Basic Envelope Quilt Label | |
| Photo for illustration | Directions |
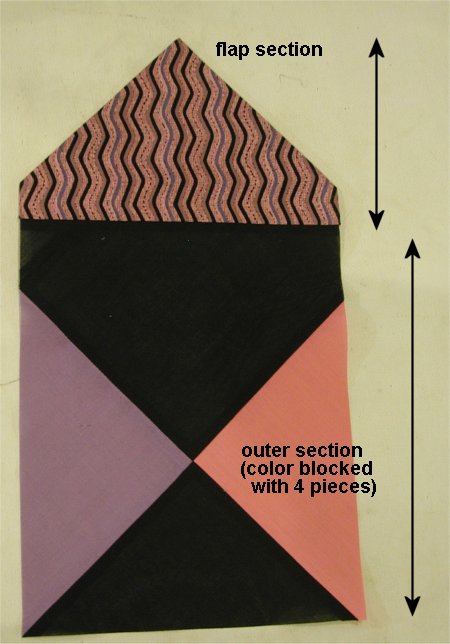 | Preparation. This is the right side of the fabric, with the flap corner already sewn and turned. You can see that I've used three different fabrics. The flap is the striped fabric. It's 7-1/2" x (about) 4". The rest is the lower envelope. It's 7-1/2" x (about) 10-1/4". All seams are 1/4". To create the color blocked lower section, I made a giant sized 4-patch, turned it on-point and then cut the 7-1/2" x (about) 10-1/4" rectangle. This was then sewn to the striped fabric rectangle. The resultant rectangle should be trimmed to 7-1/2" x 14-1/4", which is the measurement of the flap and outer envelope fabric of the Basic Envelope Quilt Label. |
| Now you can continue with the construction from the Basic Envelope Quilt Label, steps 1 through 8. | |
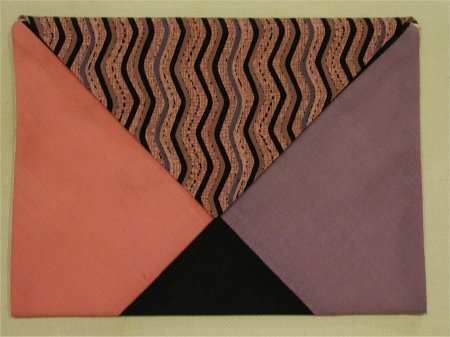 | And here is the completed Envelope Quilt Label, ready to be stitched to the quilt. It looks very much like the original SWAK quilt block envelope. |
| BACK to the Basic Envelope Quilt Label page 3 | NEXT to Variation 3, which is sewn into the side of the quilt. |