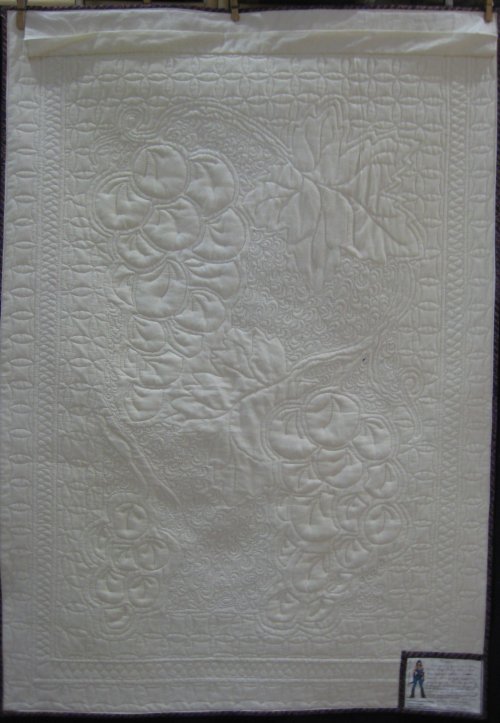
Grapes

My notes tell me that I started the applique in June 2012 and since it was a Forever Project™, I finished it about a month later (otherwise, it would have been finished much sooner than that). And there the top sat. I wasn't quite in the mood for quilting *and* I certainly didn't have a clear idea of what I wanted to do. Since this wall-hanging was to be for our family, I wanted to try to do something different from what I usually do. So, it waited.
During the months that I was cogitating on quilting, I was looking ... always looking ... at the wonderful eye-candy that shows up in the blogs that I read. You just never know when you'll find THE IDEA, or the kernel of an idea.
But, let me back up a bit. I'm getting a bit ahead of the story by talking about the quilting so early! :-)
The background fabric is the luscious, fabulous, gold-veined, mottled fabric. I have no idea where I got it or even when. I didn't have a whole lot of it, but what I had turned out to be the perfect size.
The applique fabric is a *perfect* grape-colored mottled fabric. Once again it came from my stash, so I'm not aware of when or where I purchased it. Providence was smiling on me, however, because the grape fabric was the perfect size for the applique.
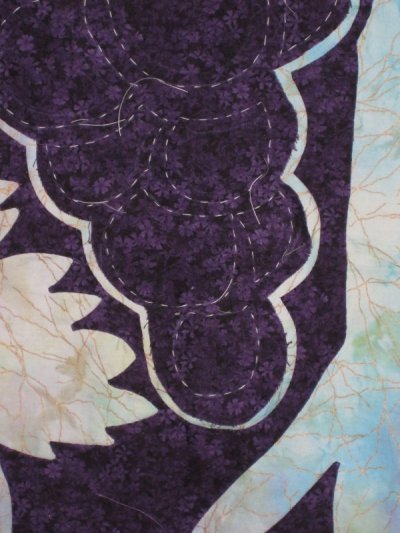 Nancy Lee Chong's method for needleturn applique simply clicked with me. Her technique for her "2 Fabric Applique" patterns is simple: on the right side of the applique fabric, you trace the *finished* seamline. Once the entire design has been traced, with a sturdy thread (I use hand-quilting thread), you hand stitch the background and applique fabric together right on that seamline. When you're done, all of your traced lines have been stitched. This stitching is temporary, so you don't need to be tidy or small. You don't want to use a large basting stitch but you don't want to use a quilting sized stitch either.
The beauty of her technique lies in those temporary stitches! They hold the fabric layers together WITHOUT PINS. This means you can carry your applique project everywhere without worrying about losing pins or the fabric becoming misaligned. It also means that you can scrunch up the fabric to do the needleturn stitched without having the pins *stick* you! :-)
With small, sharp scissors, you carefully cut away the excess fabric, leaving just a small seam allowance for the needleturn. The temporary stitches are removed immediately prior to the needleturn. It's simply an ingenious method and the only one I use for needleturn applique. She also has a wonderful technique for making those corners and points "pointy" instead of rounded.
Let's move the story ahead to the quilting part, shall we? As I said, I had been looking at inspirational pictures, magazines and other people's projects. It hit me that I could do a faux trapunto effect on the grapes themselves, so they would be all nice and puffy after the quilting. This was done on my home sewing machine, prior to loading onto the longarm.
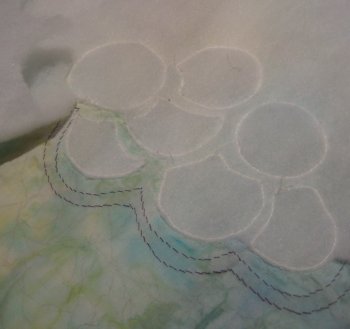 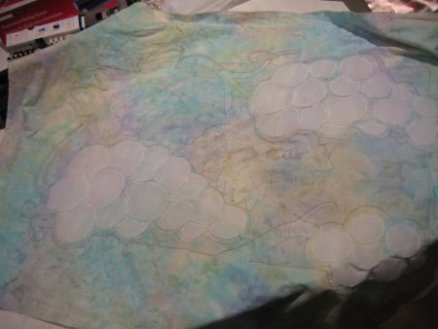 |
| I found some scraps of fluffy polyester batting and outline stitched around each grape with water-soluable thread. Once all the grapes had been stitched, I cut away the batting very close to the stitching, leaving batting only in the grape interiors. When the wall-hanging is completely quilted and bound, a thorough spritzing with water will cause the water-soluable thread to .. well .. dissolve, leaving only the outline stitching visible. Amazing stuff. :-) |
The top was then loaded onto my longarm, a Tin Lizzie. Because this was a wall-hanging, a flat dense batting would be fine. It just so happened that I had 2 large pieces of leftover Warm & Naturnal. I spliced them together to make one piece big enough.
A word about the thread I used: I wanted the thread to blend into the background. I needed it to be fine and especially the correct color. My first choice is Superior brand thread because that's what I first used. I like Superior threads and have tended to stay with it. For this project, Superior's "Bottom Line" had exactly the color I needed for matching the background and grape fabrics. I would have used their "So Fine" if the colors had been a better match, but they didn't. For the accent stitching in the leaves and grapes, I used Fil-Tec's "Glide".
 Then .. then .. then ... using "Bottom Line" thread that matched the background fabric, I outline stitched every single appliqued edge. All the grapes. Oy vey, the grapes! Each one required a separate start & stop ... and that required me to tie and bury each and every tail. Generally speaking, I do tie and bury all the thread tails. That's the way I was taught and it seems "right" to me. Also, my Lizzie doesn't have a lock-stitch and I don't quite trust *me* to make a sufficient number of teeny-tiny stitches manually .. especially on quilts that are going to be laundered. Since this is a wall-hanging, I suppose I could have gotten away with a manual lock-stitch .. but .. ::shrug:: I didn't.
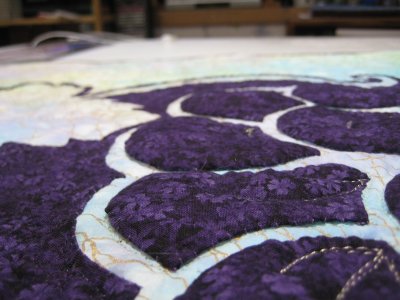
Because I had previously stitched the puffy polyester batting behind each grape, the outline stitching caused each grape to have a 3D effect ... it was so lovely!
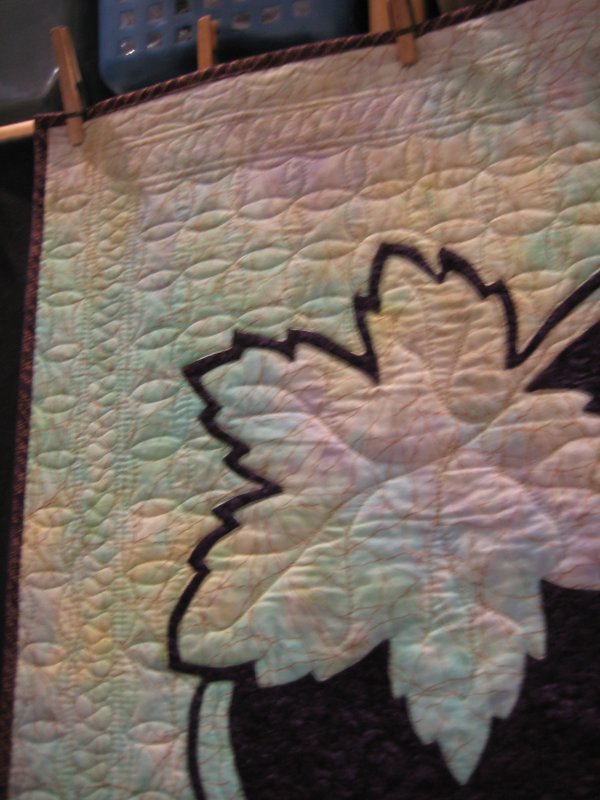
More outline stitching was continued around the grape leaves and the perimeter of the applique. EVERY applique edge was outline stitched. I thought I would never get done! It's very tedious, exacting work. You want to get just as close to the applique edge as you can without actually stitching ON the applique. Since a longarm machine is omnidirectional, it can move in any direction you want it to ... and sometimes directions that you DON'T want it to! The outline stitching on this project isn't 100% perfect but it's as good as my skill level at this point allowed me to do. I'm pleased with my efforts.
All that outline stitching reinforced my conviction that this kind of precision stitching really *is* better suited for your home machine. I can get phenomenal outline stitching that way, but I just refuse to man-handle big quilts through the limited throat space any longer. So, sadly, I am forced to get better about outline stitching on the longarm. :-)
Once all of the outline stitching was done, the top was reasonably stabilized and I moved to working on all that background space. I've been noticing a trend towards doing interesting stitching in the negative spaces. Instead of doing a filler stitch, actual designs are stitched. I decided I would try something in this area. Nothing too ambitious because I'm definitely feeling my way around.
 I wanted a 3-part "frame" around the grapes; a narrow space, a wider space and another narrow space. The two narrow spaces would be left unquilted and the wider space between them would get a 'ribbon candy' design, which would flatten the area between the two narrow spaces. My intent was to allow those two narrow spaces to become "puffy" due to the surrounding areas being flat. I was almost successful in that effort. :-) I think my choice of the flat Warm & Natural didn't allow for the puffiness that I wanted. I suppose I could have done the faux trapunto approach with the frame, but by the time I realized I wasn't getting that puffiness, it was way too late for trapunto. ::shrug:: Ah well.
Because this frame needed to be equidistant around the applique, I realized I needed to mark the frame lines prior to stitching. I haven't always had great success with "disappearing" ink pens and have avoided using them. But I needed a fine line for the marking, so using a Collins fine line water erasable blue marker, I held my breath and drew on the background fabric. Using the same color Bottom Line thread as before, I stitched all the frame lines and then the ribbon candy in the middle space.
I discovered that I wasn't *PRECISELY* accurate when I centered the applique fabric on the background fabric. What you are *supposed* to do is fold each fabric in quarters and line them up on those fold lines. However, for whatever reason, I positioned the applique fabric a little high on the background fabric.
Drats.
This meant that I had a smaller area at the top than at the bottom. Drats. Well .. ::shrug:: it is what it is.
Once the frame area was stitched, I needed to quilt the inner area between the applique and the frame and also the outer area outside the frame. I could have done different filler stitches in these two areas but I thought using the *same* quilting design would give the piece some consistentcy ... and be easier on me!
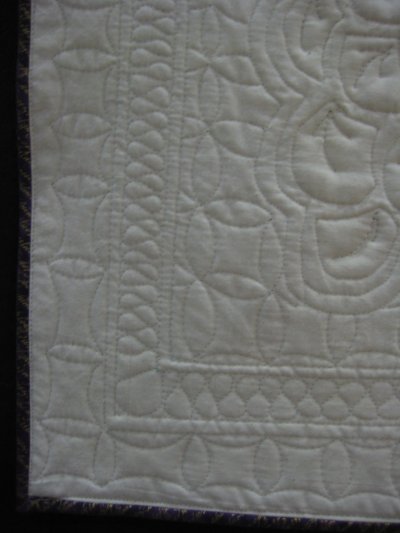
 I chose to stitch Continuous Curves. I've always liked the optical illusion of interlocking circles this design yields and I love the continuous stitching path you can use to create it! I love having only one start and one stop! :-)
Carla Barrett is one of my favorite quilters and designers. I've never actually met her but I'm a big fan of hers. She does absolutely incredible quilting AND is very generous is sharing her knowledge and expertise with others. She has diagramed the quilting path for a single pass Continuous Curve (it's about half-way down that page). She has lots of other tutorials, so it would behoove you to check out her website. She currently has a Feather tutorial on her blog.
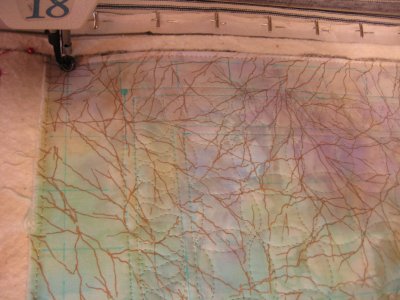
The one requirement for Continuous Curves is that it needs a foundation grid so you can get all the curves positioned correctly. Many times, this grid is provided by the pieced work of the top itself. But this top has no pieced work. I would need to DRAW the foundation grid onto the background fabric.
 Taking my courage in hand, I used the Collins fine line pen once more and drew a grid right on the background fabric.
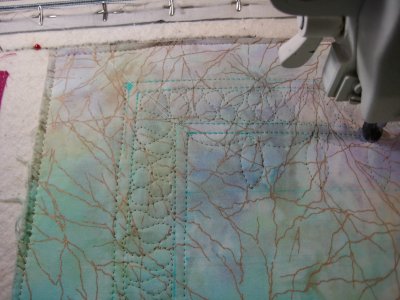
I do apologize for this picture; it was very difficult to get a good picture of the drawn lines.
But if you look closely enough, you can see the blue lines in the area outside the frame.
The area inside the frame has already been stitched with the Continuous Curves.
And this, then, was my experiment with negative space quilting. :-)

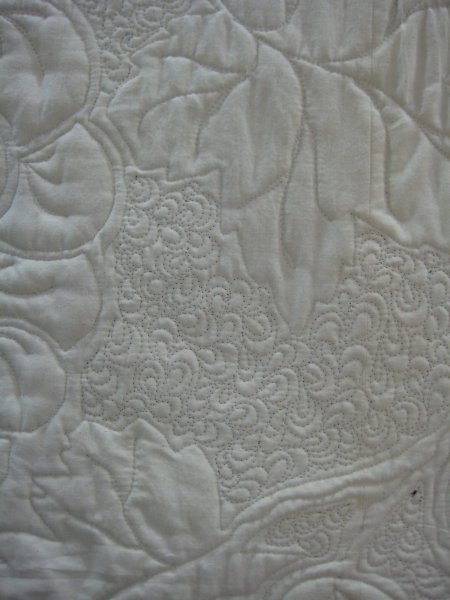
At this point in the project, all of the background fabric has been quilted and I could change the thread to the next color, which was the grape-colored thread. My plan was to densely over-quilt the applique that was NOT the grapes. I was thinking that by flattening those areas, the grapes themselves would puff up better. So, I stitched a VERY dense echo clamshell design. I've used this design before and am becoming more at ease with stitching it. The problem I experienced was that the thread color matched the fabric color EXACTLY. And since the fabric was a dark shade, it sucked in all the light.
 You know just how impossible it is to sew on black fabric with black thread at night?
Well, this was only a tad easier, even in the daylight. I have a lot of light on Lizzie's sewing area but the fabric is just dark enough and the thread color matched SO PERFECTLY, that I was hard-pressed at times to see where I had already stitched.
But I persevered and figured .. heck, if *I* was having a difficult time seeing the stitching from about 12" away, no one ELSE was going to see any problems from across the room! :-)
As difficult a time I had in the stitching, trying to PHOTOGRAPH this stitching was definitely impossible!
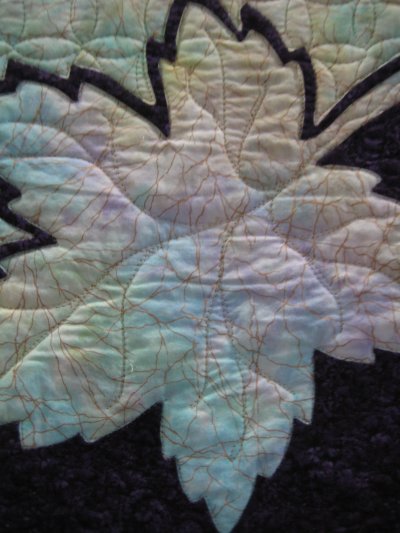
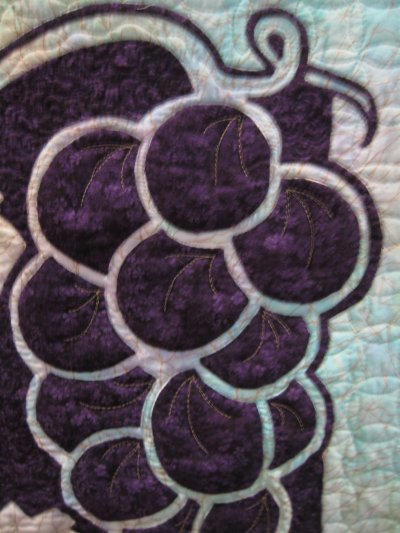 Finally, it was time for the last thead color ... gold Glide. I used this to stitch the veining in the leaves and the "highlight" accent marks on the grapes.
 I've used this Glide thread on several projects now and just love it. I have been advised, however, that since this is a trilobal polyester thread, it is "slippery". The bobbin thread needs to be cotton, to allow the trilobal to "grab" it nicely ... OR ... to be SURE and lock-stitch/tie the tails. Since I've been using "Bottom Line" in the bobbin, I was very careful to stitch several small stiches in place AND tie/bury the tails.
Once again, I used the blue marking pen to draw in the leaf vein lines, since I don't quite trust myself to wing it properly.
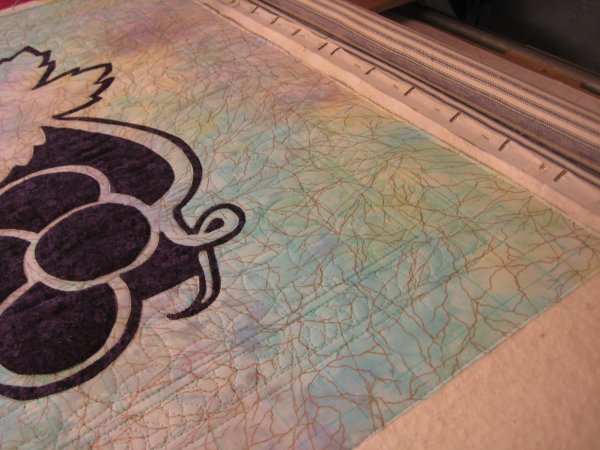
Here are some pictures of the back, so you can see the quilting more clearly .. especially that elusive echo clamshell filler! :-)
The final step was to give the front of the wall-hanging a nice spritz of water to remove all of the Collins blue pen and the water-soluable thread. I really *did* hold my breath at this point, hoping that the blue lines would come out and the thread would dissolve properly. I'm very pleased to say they both did what they were supposed to do, although I did need to apply a second spritz to the blue line areas I missed the first time. :-)