4-patch and Straight Furrows

size: 64"x78"
Another top completed .. and the big news with this one is that I was using up those leftover hand-pieced 4-patch blocks!! Man, I am so *TIRED* of looking at them! (addendum: little did I know that I had ONE MORE bed-sized quilt and *two* toddler quilts to make with these 4-patchs and I'd STILL have more blocks leftover!)
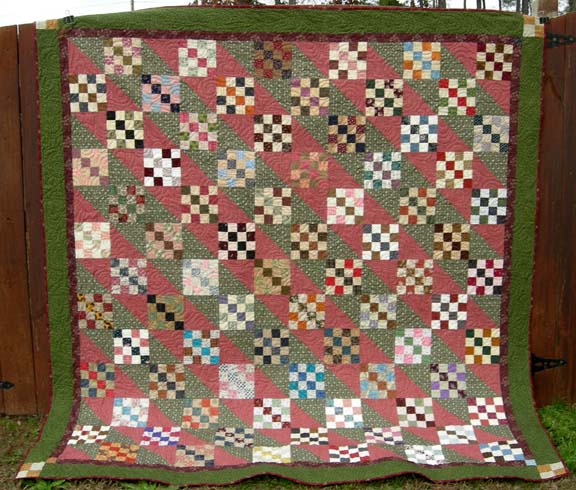 I used Bonnie Hunter's free pattern, "4-patch and furrows" (picture on left). I did depart from the pattern by use of my leftover 4-patch blocks (instead of her 16-patch blocks) AND I did a dramatically different border treatment by extending the diagonal color bands (created by the half-square triangle blocks) to create the final, outer border.
I used the grid method to sew LOTS of identical half-square triangles. Do you know how to make them? Here's a list of sites that give you instructions (in no particular order): here, and here, and here. Honestly, using the grid method is the only technique to use if you need to make a whole bunch of identical half-square triangles.
I *know* that you need to make the grid markings larger than the finished block. Did I remember to DO that? Nope. The result? Well.... the resulting half-square triangle blocks were SMALLER than the hand-pieced 4-patch blocks. I didn't have more fabric to re-do the half-square triangle blocks. ::thunk head on wall:: Geez, that was really dumb. REALLY dumb.
So, the only thing to do was to cut down the 4-patch blocks to match the size of the half-square triangles. And you all KNOW that when you cut a hand-pieced seam it doesn't HOLD like a machine pieced seam. aarrgghhh. ::sigh:: Quite a few of the seams of the 4-patch blocks had to be resewn at the ends. There's nothing quite like making more work for youself. (ya big dummy!)
While the fabrics used in the half-square triangle blocks were the same, I used a variety of burgundy and ecru fabrics for the outer border ... only because I didn't have any one fabric in either of those colors to make the entire border! As it happened, there were a number of 'creative seaming' opportunities to get a hunk of fabric large enough to cut the border shape. :-)
The top was pieced in August of 2011 and joined its compatriots in the Pile of Tops to be quilted. :-)
And much like a number of OTHER tops that I pieced around this time, this top ALSO didn't have a complete information file. When I finally got around to making this web page (in 2012), details of how I did a lot of the quilting simply escape me. I'll do my best to retro-actively remember what I did.
Let's fast-forward to February 2011 ... time to quilt!
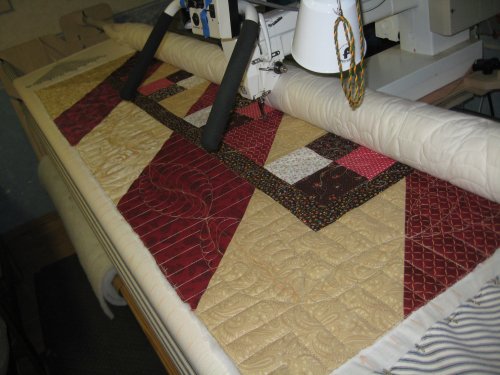
The outer borders got a real nifty design of pointed ovals with bead-board.
In looking at the pictures, I can see that I evenly spaced all the pointed ovals. I'm assuming that I must have divided the border space with a string that I kept folding over and over to get even multiples. However, that couldn't be quite right because I can see that the ovals that run into the corners are ::ahem:: "not quite right". Mmmm .. "oops". :-)
How I arrived at the size of the ovals, I haven't a clue because I KNOW I don't have a template for that shape. I must have used an arc template to get the oval shape.
I think. Could be. Maybe.
Geez, why didn't I finish up that info file???
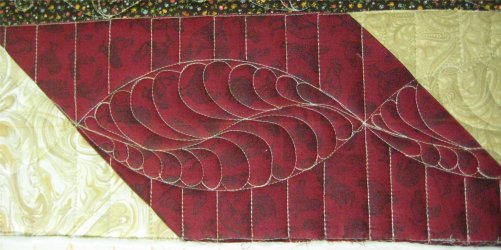 By this time, I must have discovered Karen McTavish's YouTube video on how she makes Victorian Feathers, which are tall and skinny (as opposed to the feathers that I've been making, which are short and fat. :-) ). I had an honest-to-goodness Light Bulb (tm) Moment when I watched that video: she uses a "bump-bump" method to make her feathers. To me, it was a combination of Sally Terry's Hooked Feathers PLUS Karen's over the top "bump". Since I already knew about the hooked feathers, I could now SEE how these wonderful feathers were stitched. These feathers look more like traditional hand-quilted feathers and have minimal back-tracking. And *dang* .. I could do them!
I divided the pointed oval with a curved spine and put feathers on either side. Man, I was just in love with them. :-)
And the bead-board on either side of the oval! I saw how someone else lined up the vertical lines; it was simply ingenious! Where the oval interrupted the vertical line, a lock stitch was done then you just DRAGGED the machine head to the other side of the oval to continue the vertical line! When all the stitching is completed, you just snip off the free floating thread. Gosh, how *fantastic*! That absolutely ensures that the vertical lines are in alignment with each other. This design would look awful if the vertical lines didn't line up with each other.
 The inner border got Carla Barrett's "Swirly Design for Borders and Sashings". Geez, are you surprised at this? LOL! If you've been looking at my quilt pages, you will have seen this quilting design about a gazillion times! I never get tired of doing it .. it's easy and looks great. :-)
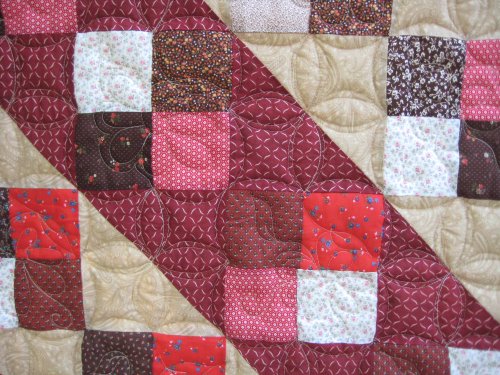 That leaves the quilting in the interior ... what did I do across all those half-square triangles and 4-patches?
You can't really tell from the picture but there is a continuous curve variation in the half-square triangles and free-motion daisies in the 4-patches.
I stitched them as a horizontal row ... alternating between the two designs as I came to the appropriate block.


Here's the free-motion daisies in the 4-patch blocks.
You can hardly see it because of the print fabric.
On the right, I've drawn in the quilting path. Start on the left at the green arrow and exit on the right at the green arrow.
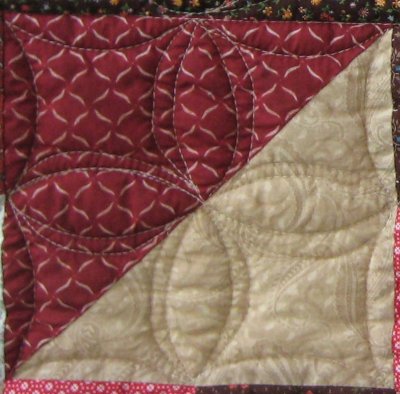

Here's the continuous curve variation that I did in the half-square triangles.
I'm not quite sure why I didn't do the continuous curve in the 4-patch; that would have been a natural choice.
Maybe because it was so obvious and a little change-up is a good thing?
Combining these two designs as free-motion quilting was very, very easy.
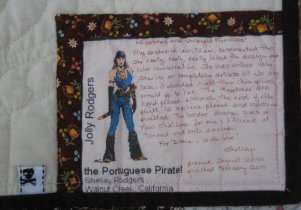

Which leads us to the very last component of the quilt: the label!
Of course, I put in my pirate label; that goes in all the quilts I give as gifts and keep for the family.
I'm also trying to remember to USE my embroidery machine! I found a faux cutwork sample from Elsa's Designs (available at Stitchery Mall), which I used as a corner design. The lettering is Corsiva font from a website that is no longer in existence.