Sawtooth Star #2
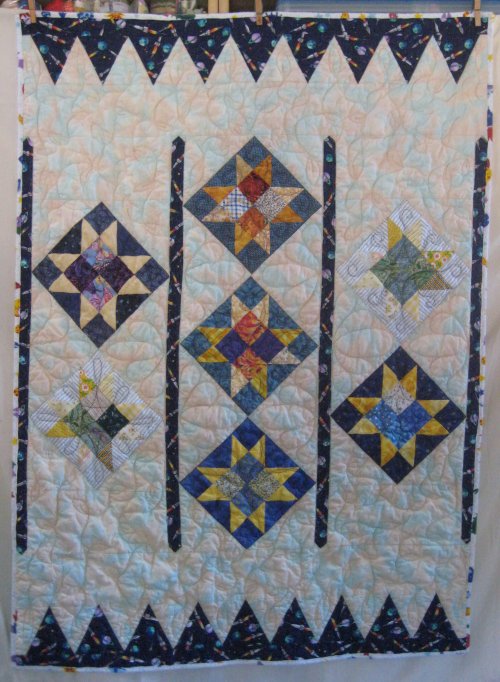
size: 38"x52"

Disclaimer: the following text is also in the first Sawtooth Star quilt that I did. I repeat it here for those Dear Readers who either don't remember the first quilt or never saw the page for the first quilt:
Whilst waiting for my quilting thead to arrive in the mail (so I could finish the quilt that's on Lizzie), I was making other tops by delving into my cubbies and dragging out OLD projects, looking through my bookshelf and picking out an interesting book but mostly trying to use up my stash fabric.
One such OLD project happened to be a year 2000 swap, when our online Quilting Forum was on Delphi, not About.com. Year 2000 was when I really seriously got into quilting and was joining swaps right and left, without realizing that all those swaps were, as fun as they were, simply generating *more* projects! After this realization, I stopped swapping. :-)
When I pulled out the blocks from this swap, I also rediscovered the reason why swaps are risky .... because you have so many participants of different skill levels, you are going to get blocks of various quality. The block of this swap call for this block to be 12" finished, but the swap hostess must have given us different cutting directions because the blocks that I have came out to be 8" finished.
Or ... at least they were SUPPOSED to be 8" finished (this means that the unfinished, raw block needs to be 8-1/2" square). Of the 11 blocks I received, fully 6 of them were 8" unfinished. Sadly, those blocks would not be able to play with the other swapped blocks, which *were* 8-1/2" unfinished.
Since I now had a reduced inventory of blocks to work with, I decided to make 2 charity quilts with the appropriately sized blocks. For those that were 8" unfinished, I alternated them with a plain fabric square, resulting in a center medallion. I have a specific, minimum size for the quilts I make and I needed to put on some borders to make this quilt the proper size. I surrounded the medallion with a narrow dark blue border, then a border of pieced 4" blocks then a final, wider outer border.
Deciding on what the 4" pieced block was going to be was determined by a rediscovery of a specialty ruler set.
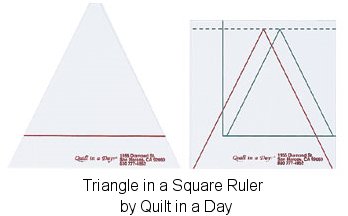 I'm not one for having a bunch of specialty rulers. Most of the time, it's possible to get what you need with math and a standard quilting ruler. Sometimes you really do need a specialized ruler but not usually. Recently, when doing a semi-Spring Cleaning of my sewing area (please note that I did NOT say the sewing *room*!), I rediscovered a specialty ruler set. It's "The Triangle in a Square Rulers" by Eleanor Burns (of Quilt in a Day). I have NO idea why I bought it or even how long ago, but I'm sure it was an impulse item. I'd even toyed with the idea of selling because ...heck .. who needs it?
The triangle this ruler set produces is an equilateral or 60° triangle. This is what 1000 Pyramid quilts are made of and any 60° triangle ruler will produce this shape in varing sizes. But, I needed a square block, not just the triangles. This was a slightly different problem. Now, equilateral triangle blocks are not Flying Geese nor are they half-square triangles. They are 60° triangles with setting triangles on either side which results in a square block. Making the equilateral triangle blocks turned out to be surprisingly easy with this ruler set!
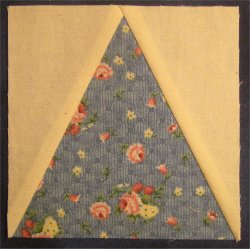 Since this ruler set produces a 4" (finished) block. Why not give it a whirl? I've gotta say that I think this ruler set is my newest, most favorite tool! :-) :-) It is absolutely *dead* easy to make 3" or 4" (finished) equilateral triangle blocks. Not only does it have a template to easily cut the 60° triangles (in fact you may already have such a ruler in your tool kit) but also has directions on how to cut the oddball setting triangles and a template that you use to trim the block to create the finished block with the equilateral triangle smack-dab in the middle of the block.
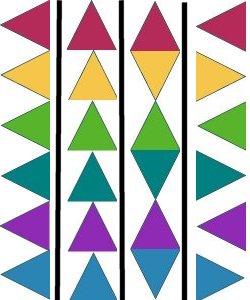 Once I had all those lovely, lovely square blocks with that perfect equilateral triangle in the middle, how should I USE them? Using Electric Quilt, I played around with different layouts and came up with four that were attractive. I ended up using the one on the far left ... but .... I have to admit that the one on the far right is very intriguing. I'll need to remember this layout for another quilt.
A quilting associate of mine asked why I didn't just use ALL equilateral triangles for the border? An excellent question, since the final layout does look like that. But, if you remember, the BLOCK I had made was of an equilateral triangle with setting triangles on the sides. Those setting triangles are actually HALF of an equilateral triangle, so when you put the two halves together .. you get a whole one! If you look closely at the big picture up top or at the detail picture below, you can see the seam line down the middle of the muslin triangles.
I love this set! :-) And no ... you may not buy it from me. Get your own.
OK then .. here's the new information for this second Sawtooth Star quilt:
From a blog I had read, I saw a simple on-point layout that would work well. The on-point blocks were put in columns; between the on-point columns were narrow sashing/border columns. The same fabric that was between the on-point columns was also used for a narrow border around all the on-point columns. Surround all of this was a slab-o-border. It looked simple enough to do. :-)
Except ... I had 7 blocks, not 9. AND I would need to create some setting triangles to make the sawtooth blocks into an on-point orientation. I had the perfect mottled fabric for the background fabric so making them into on-point blocks was simple. As for the number of blocks? Not a problem; I would just stagger the two outside columns and put in some compensating background fabric.
And the slab-o-border? Nope, that idea went out the window ... I needed to use up all the equilateral triangles I had made from a dark blue spaceship fabric. *They* were going to be the borders. BUT ... I didn't have enough for all four sides. Not a problem; there would just be a top and bottom border. :-)
Then ... those sashing & inner borders. Hmm .. well ... that wouldn't work either. After making all those equilateral triangles for the borders, there was a VERY limited amount of the spaceship fabric leftover. Enough for really narrow borders between the sawtooth blocks ... but even then, not enough for full length sashings.
Oh .. what to do? What to do??
The background fabric was used as a float border to give me the length I needed for the quilt. And voila!! The quilt was pieced!
Looks a little different from the blog inspiration quilt, doesn't it? :-)
Then came the Quilting Part. Sometimes I indulge in the Sit and Stare technique. Sometimes I have a definite quilting design in mind. And sometimes, I get to play at being the Quilt Whisperer. :-)
One aspect of these charity quilts is that I can use them as experimental quilting pieces. I can practice *on a real quilt* some of the quilting designs that interest me without the pressure of potentially ruining a client quilt. To be sure, I try to do my best on these charity quilts, but if a motif gets messed up, it's not the end of the world.
I was absolutely thrilled and delighted with this whimsical design and marveled at her imagination. :-) Let's fast forward to about a couple of months ago. The quilting books by Darlene Epp had been brought to my attention. I bought the entire set of 3 and whilst looking through the book on Borders and Sashings ... what I did see?? That EXACT whimsical design that "my" quilter had done! Oh my, she cheats too! :-) :-) She used the design from Darlene Epp's book on my quilt! (She later showed me her copies that she had bought many years previously.)
What that meant was that *I could do it too*! Or .. at least attempt to do it. :-)
What I didn't realize (and didn't check) was that on the quilt that she had done, that sashing was 2" wide. On this charity quilt, the sashings are only one inch wide! Man, that's a BIG difference. But, let it never be said that I don't forge ahead.
Doesn't the phrase "Fools rush in where angels fear to tread" come to mind? :-)
But, I did it. And I'm pleased with myself. :-) The child who gets this quilt will never look at the quilting in the sashing, but *I* know that I did it. :-)
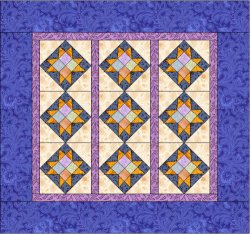 There were 7 Sawtooth Star blocks remaining from the swap (5 from the swap and 2 of my own) to be used for this quilt. These blocks were all 8.5" unfinished.
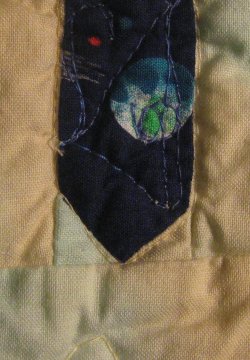 Solution! To accomodate the amount of fabric that I had, I decided to have "floating" sashings in between the on-point blocks ... i.e. the sashings would not terminate into top/bottom borders ... they were going to be just as long as the on-point blocks. Having the sashing fabric be abruptly cut off would look kinda wierd, so I put extremely small (1" square) blocks of the background fabric on each end to make it look as though the sashings ended in points (the same technique that is used in making Snowball blocks).
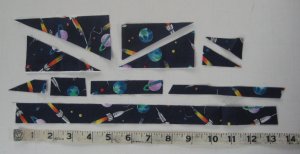 There isn't even enough left of the spaceship fabric to put in my scrap basket! :-)
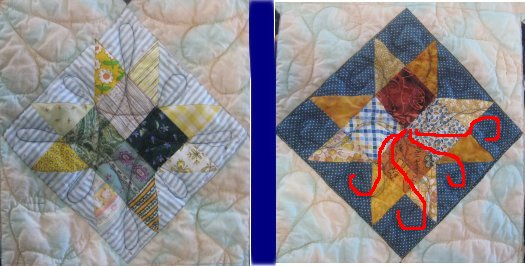 For this quilt, I wanted to do something similar-yet-different in the sawtooth star blocks. In each of them, I did a curly or loopy starburst design.
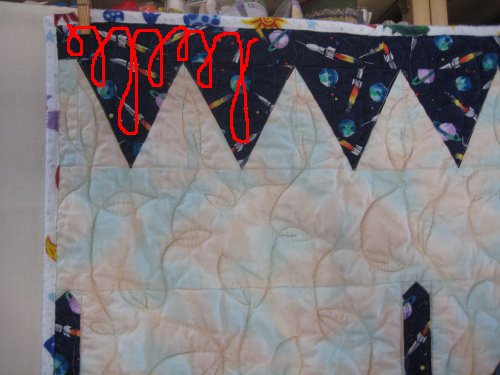 The background fabric was open enough that I wanted more practice for an all-over embellished meander. I sprinkled leaves throughout a simple meander. The equilateral triangle borders got a graduated loopy design
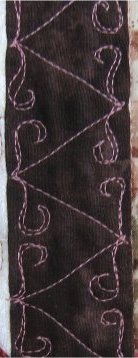 That left the sashings to do. Before I got my Lizzie, I brought several quilts to "my" local longarm quilter. She is phenomenal! In 2006, I had taken a quilt to her for quilting and she liked it so much that she did some fancy quilting in the narrow sashings. See that pink quilting in the brown sashing to the left? That's not my quilting. :-) That's what I *aspire* to be. :-)
 I wasn't so much of a fool to use highly contrasting thread, but I *did* do that design. Sure, it was shakey in a lot of places ... there isn't a whole lot of room to work with in only one inch!
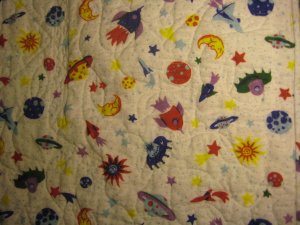 Part of my charity quilt stash (I obtained a HUGE amount of fabric from a quilting associate who was de-stashing and a lot of it wasn't to my taste but is a *wonderful* source of fabrics of charities!), I found .. of all things ... a spaceship design on white in flannel! How perfect is that?
![]() Quilting Home page
Quilting Home page