the Corvette quilt

size: 64" x 94"

That Corvette eventually was sold and another one aquired. This "new" one is a 1968 turquoise fastback, complete with a white racing stripe. I didn't admire that one as much as the '65 convertible.
Many, many, many years later, Mr. Pirate bought me my very OWN Corvette, a 1973 dark sparkle sapphire blue T-top Stingray. (Mainly because he probably got tired of hearing me bemoan the fact that EVERYONE had a Corvette but me.)
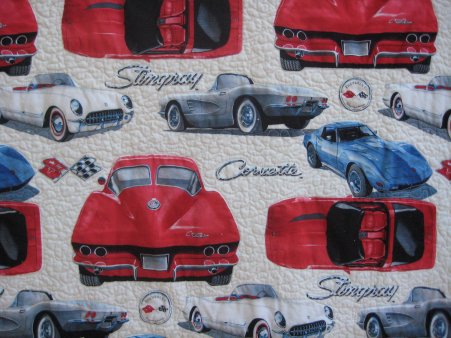
Let's fast forward to 2009. As all you fabric-holics know, if you bypass an opportunity to purchase fabric when you see it, it's gone forever and you eternally berate yourself. And so, when I saw a Corvette themed fabric in one of my local quilt stores, I immediately bought 5 yards of it. Part of it would be for my brother Mike and the other part would be for ... moi. :-)
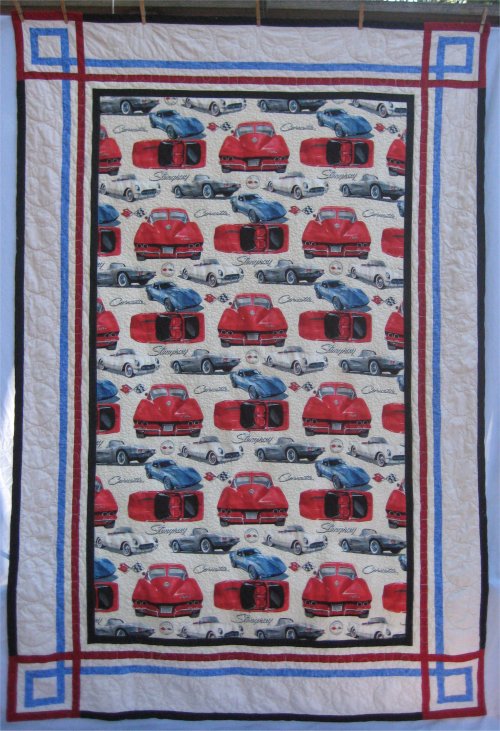
Since the placement and size of the Corvettes on the fabric were sufficiently large, it would have utterly destroyed the fabric to cut it up. I looked for a pattern that would allow me to use the fabric essentially as a "whole cloth" quilt and I was so pleased to have found exactly what I wanted. Colleen Granger's "Tranquality" pattern uses a large-scale focus fabric as the center of the quilt and surrounds it with an interesting Greek inspired border treatment.
 Quilting in the focus fabric was an easy choice: stipple around each car to emphasize them. As I stippled around each car, I also outline stitched the edge. This allowed the car itself to "puff" up.
 For the borders, I was stymied. I wasn't sure what to do. Do I quilt a motif spanning all the lines?? Do I treat the spaces separately? I'm still not experienced enough to do anything fancy.
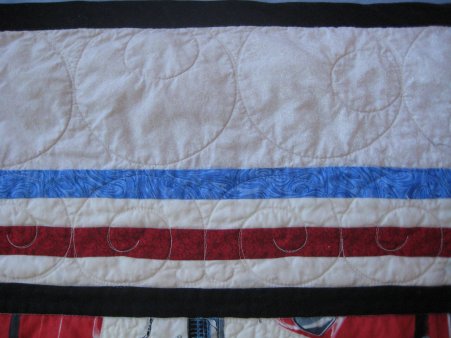
After employing the "sit and stare" technique of inspiration, I decided to quilt the border area with two different designs. One design was inspired by tires and hubcabs going 'round and 'round. The other design used some nifty spiral templates I have and was just itching to use. :-)
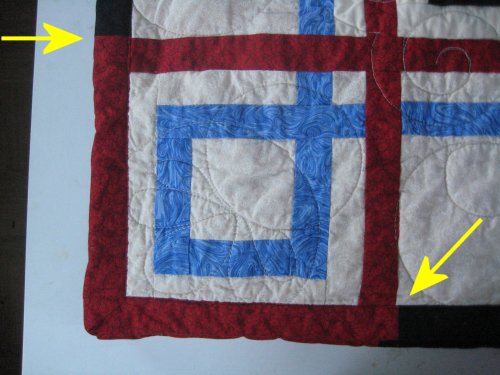
Once again, the corner quilt design simply eluded me. I repeated the circular design but it really doesn't flow nicely and I needed some other quilting further into the corner to keep the density the same. I'm not thrilled with this corner design. Sometimes you win and sometimes you lose. :-)
 Departing from the pattern, I extended the fabric of the corner border to the outer border. This makes the red square appear to be in front of the black border on the top, bottom & sides.
Furthermore, I fussy-cut the binding so that there was red binding at the corners and black binding elsewhere. It wasn't exactly perfect, but from 5 miles away on the back of a galloping horse, it looks doggone great. :-)
I pieced and quilted this quilt all without my brother having the faintest idea. Truly, it wasn't difficult, as brother Mike is clueless when it comes to my sewing; after all, he's seen me sew all my life. :-) I deliberately made this quilt overly long. Since my brother is tall (well, taller than most of the men in the family), I wanted him to be able to tuck the quilt under his chin and still have his toes covered up.
And so, it was with great pleasure that I was able to surprise him with not only a quilt for him but made with CORVETTE fabric! He was very, very happy. :-) In fact, his first comment was, "FAR OUT!" (yes, he channels the late 1960's). His second comment was, "A tapestry!".
Uh .. no. NOT a tapestry, Mike .. a quilt. A quilt that you can cover yourself to keep warm whilst watching TV.
But, evidently I was sadly misinformed. THIS was a tapestry! It was going to be hung on the wall! Hmmmmm ... this was a development I hadn't thought of. As I was thinking that now I needed to put a hanging sleeve on it, Mike continued to say that he'd put a 1x2 in front of the quilt and carriage bolts through the quilt to hang it up.
SCREECH! Stop right there. Back that up. I'm trying to understand EXACTLY what he's saying. I've certainly seen systems whereby the quilt is sandwiched between thin, flat slats and the pressure of the slats holds the quilt up. Mounting screws are drilled at the ends of the slats. If so, then no hanging sleeve was required. I inquired .. was this what he meant.
Oh no. Not at all. He really, *really*, REALLY meant to put the carriage bolts (honkin' big bolts) THROUGH the quilt. As in .. make HOLES in the quilt.
I nearly had a heart attack.
I grabbed that quilt back quicker than you could spit and emphatically informed him that NO NO NO, one did NOT put ANYTHING THROUGH a quilt. If he wanted to display it on the wall like a tapestry (I was resigned at this point that it was not going to be used as a bed quilt) then I would sew a hanging sleeve on it for proper display. I then had to show him how the hanging sleeve was used so that the quilt was NOT damaged and yet, it could still be used as a quilt in the future, should he want to.
The hanging sleeve was then sewn onto the back of the quilt and the quilt re-gifted to him. Gosh, I hope he forgets the carriage bolt idea. [worried look]