Stained Glass Placemats
and napkins! and coasters! and reversible!
June 2008
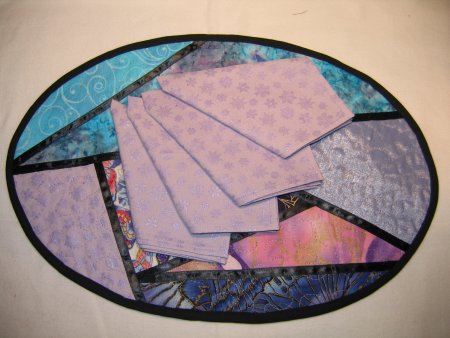

My middle daughter attends college about 1-1/2 hours from home, which is far enough away for independence but close enough in case of trouble ... but still just a bit far away to preclude frequent visits. But, she was home for about a week in early June and mentioned that she'd really like some oval placemats for her new apartment done in the style of our crazy-quilt stained glass Christmas Stockings.
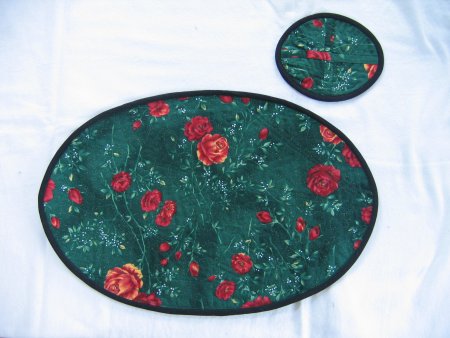
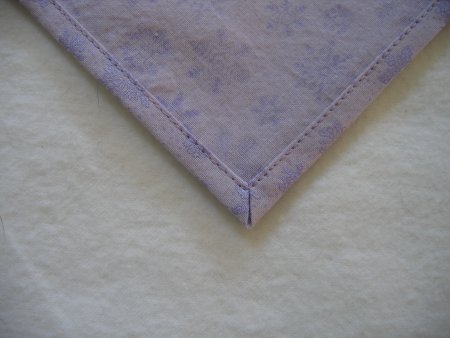
We spent some time rummaging through my stash in search of suitable blues and purples, eventually coming up with about 10 different fabrics. We also found a vaguely Christmasy green background with red roses fabric for the reverse. After making the 4 placemats, there was enough of a light lavender fabric to make 4 napkins, which have mitered corners.
I like making mitered corners for napkins and tablecloths because they are so nice and flat. I have a tutorial in a downloadable PDF on how to make perfectly FLAT mitered hem corner. Left mouse-click to look at the PDF; right mouse-click for download.
Since I am horribly unoriginal, I used an Electric Quilt crazy quilt block layout and enlarged it to placemat size (in this case, 12"x18").
I've made quilted placemats before and have realized that thinner batting is better, as the thicker stuff will make glasses wobbly. Since I didn't have any thin batting on hand, I used white flannel instead.
Since all of the lines between fabrics were straight, I didn't need to use bias for the stained glass "leading". I tried to make my own 1/4" tape using the Clover Bias Makers, which cleverly turn the long raw edges under 1/4". I've used other sizes before and have had excellent results. However, the 1/4" maker is *really* tiny and I never got the good results that I wanted. Although I do like using Clover's Quick Bias (because they are very, *very* flat and look lovely), they tend to be expensive. BUT, since all the lines were straight, I *could* use straight-of-grain ... in fact, to make it easy on myself, I decided to use narrow satin ribbon! Buying it on a spool from Joann's was very cost effective! And it looks very pretty. :-)
The construction technique I used is a variation of the one I used for the Christmas stockings. After cutting the rectangle of flannel, I used a light coating of spray adhesive on it. This made the surface "tacky". I cut the EQ layout apart to use as templates for the individual crazy quilt pieces. After cutting out each piece, I laid it on the sticky flannel. Eventually, the flannel became filled with all the crazy quilt pieces. After putting the backing in place, I quilted it with an all-over meander. After the quilting, I laid down the satin ribbon over the raw edges of the crazy quilt pieces and edge-stitched both sides of the ribbon. When you do the leading lines, you have to work from the center out and the background to the foreground ... you need to be aware of which lines cover others ... it isn't always obvious. Sometimes you start to sew the leading line down only to discover that an intersecting line needed to be done first!
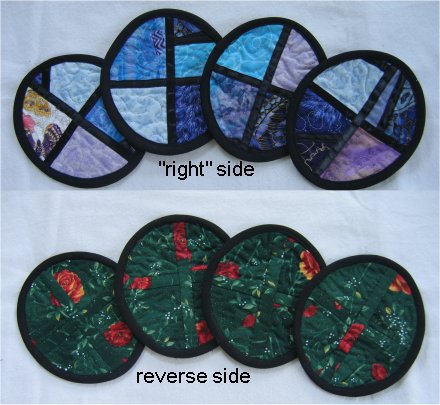 After all the quilting and leading lines were stitched down, I used an oval template to round the corners properly. Interestingly, the corners that got cut off were somewhat "substantial" pieces. Now, I just hate to waste potentially useful pieces, so I butted the straight edges of these corner pieces together & zig-zagged them. This resulted in a wierd curvy diamond sort of shape. Out of this shape, I cut the largest oval I could and this resulted in coasters! Over zig-zag line and to cover it, I top-stitched the ribbon, just like on the placemat. On the reverse side, I appliqued a self-fabric strip of fabric to cover the zig-zag stitches on that side.
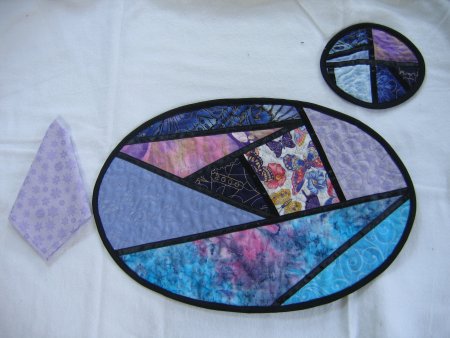
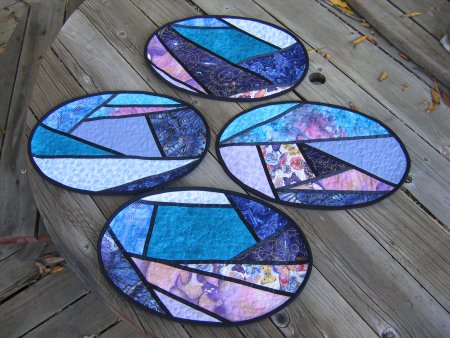
Both the placemats and coasters were finished with black bias (self-made, not ribbon). I made a total of 4 placemats. The set(placemat, coaster & napkin) look pretty nice together! I didn't have any suitable green fabric for napkins for the reverse side, so that remains to be done at some future point.