Border print placemats
Date made: August 2003
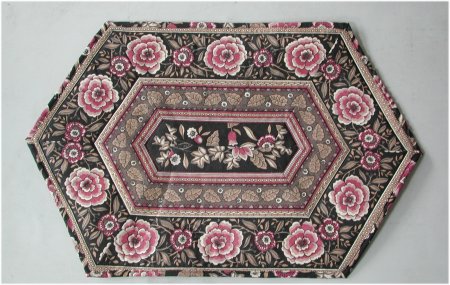
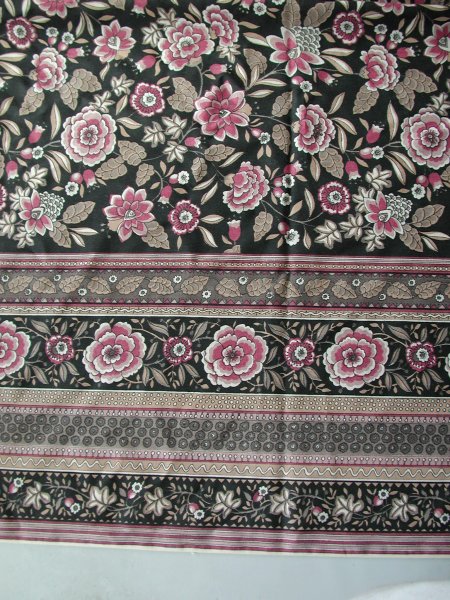
Recently, I was able to take advantage of a workshop sponsored by the guild I belong to. The instructor was a shop owner, Susan Berbec, of a store in Sacramento. For all I know, Susan may also be a nationally known author & teacher .. I really don't keep up with what's happening & shaking. (I mention this because it's happened to me more than once . I take a class and only afterwards do I find out that the instructor was one of the most famous teachers for that topic.) The class was working with border prints and the project was a placemat, from Jinny Beyer's website.
I've worked with border prints before; I've made placemats before. But I'm always interested in taking classes, because you just never know what interesting tidbit of information you will walk away with. In this case, the extremely helpful piece of knowledge I now have is when working with fabric that you absolutely need (or want) to piece accurately and bias edges are involved, to stabilize the fabric with spray starch. Heavily stabilize it. I mean, stiff as a board. The product the instructor suggested is "Perfect Sew", although she said that spray starch is an adequate substitute. I will say that "Perfect Sew" absolutely does make your fabric stiff enough to walk on. :-)
 Unfortnately, I didn't pre-stiffen my fabric. I'm not entirely sure if I misread the class instructions or if she was unclear; only 2 people of the class of 10 prepared their fabric ahead of time; the rest of us didn't. I even went to the trouble of ordering the stuff from Nancy's Notions, since my LQS & Joann's don't carry it. I couldn't do it at the class, as it's definately something that you need to do at least a day ahead of time since you have to totally saturate the fabric then let it dry. Well .. now I have it for the rest of the project. :-)
Part of the class involved how to "audtion" fabric by using a hinged mirror thingy to see how a mirror-image of that section of fabric would look like. Another part was about what to look for when you are placing your template on the fabric in terms of design continuity (if possible .. sometimes it's not) and potential problem spots. We learned how the instructor marked her fabrics for accurate sewing and to expect to straighten up the center seam line of the two sections before they were sewn together (apparently, the adjacent bias edges cause some distortion). We also learned that if our miter seams aren't exactly to our liking, we can "fudge" a little and cover the offending mis-match by using a machine decorative stitch over the seam, much like a crazy quilt. :-)
We were also shown her method of binding the edge of the placemat. She uses the "wrap the backing to the front" method, a technique I really, *really*, REALLY dislike .... ESPECIALLY for placemats. But, I did it for the class, just to have the experience. (It only reinforced my previously-held opinion). The problem I have with it is that there is only a single layer of fabric wrapping around the edge. Placemats, if consistently used, get very hard use and laundering. That single fabric edge is going to give out VERY fast. I know this because it has happened to me on another set of placemats I've made. (I now need to replace the bindings on those other placemats before I can start to re-use them.) Eventually, I will rip out the wrap-around binding on this one placemat and re-do it with traditional double-fold French binding when I get around to making the rest of the placemats. :-)
Since these placemats and the tablerunner have non-square corner (they are, in fact, 60° corners), you might wonder what the method is to bind them? Well, you are in luck! The technique is *exactly* the same as with regular, square corners, with one slight variation. I've put together a tutorial on Mitering Oddball Corners. It's not difficult and looks wonderful.
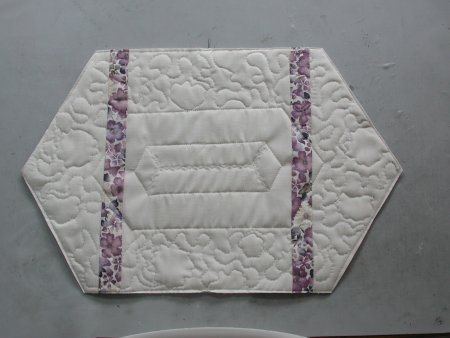 When it came to finding a backing for the placemats, I decided to use plain, ol' muslin. Unfortunately, the placemat was EVER SO SLIGHTLY longer than the muslin was wide. I didn't really want to go lengthwise on the muslin, as that would have left me with more scraps. Instead, I chose to "widen" the muslin with some spacer strips.
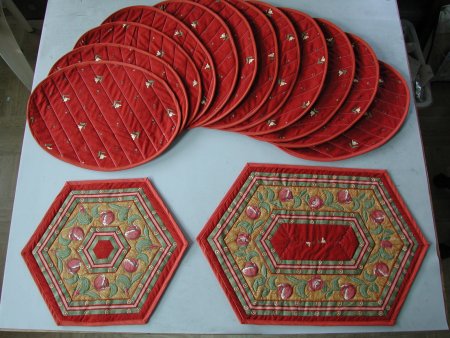 I actually liked making these placemats (I ended up being able to make 8 placemats and a table runner) that I dug out some other border print fabric I had in my stash. From this second border print, I was able to make 12 placemats and 2 different sized centerpieces.