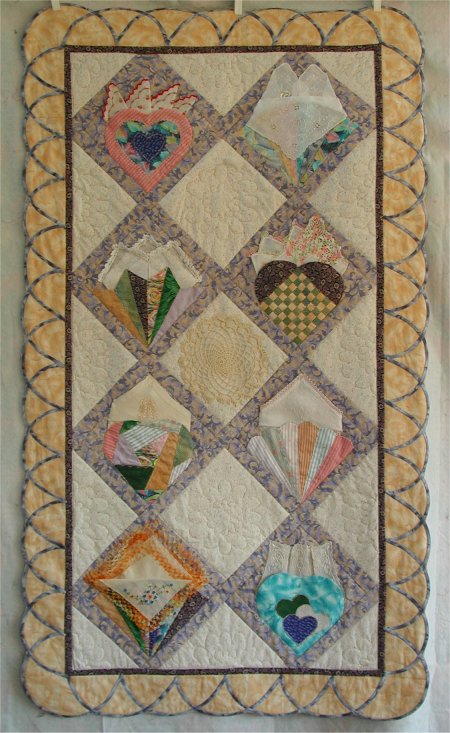
Victorian Hanky Pockets
Date made: March through August 2002


Just call me butter ... cuz I'm on a roll! :-)
I *firmly* resolved this year to finish a substantial number of UFOs; to *not* start any new quilts. I really did have good intentions. :-)
Then this past March, I saw a quilt being offered as a class that would actually serve a dual purpose: a display piece for several fancy handkerchiefs that I owned plus use up more of my stash. (When I take a store class, I try to use as much of my stash as possible .. to kinda/sorta justify taking the class, ya know? :-/ ) I certainly didn't *need* to take the class, but the quilt was *so* cute ... besides I *did* have these handkerchiefs ..
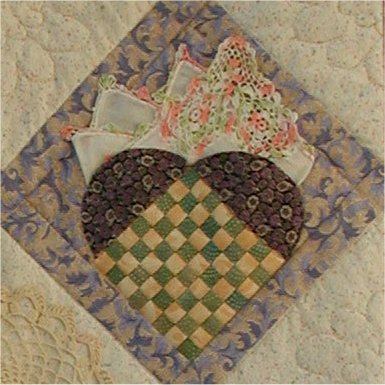
 The quilt was designed and taught by Peggy True formerly of Clayton, CA (just up the road from me) as a sampler piece of techniques. The focal points are the heart-shaped and fan-shaped pockets that you eventually tuck creatively-folded handkerchiefs into. Each pocket features a different piecing technique: paper-piecing, crazy quilting and woven strips. The fan edges are either smooth, pointed or scalloped.
The instructor's quilt featured a standard fabric border, but I wanted something a little different, so I looked in one of my Celtic design books and found a simple scallop layout. Because I wanted the scallop edge to be the finished edge of the quilt, I used the envelope/pillowcase technique that finishes the edges before the quilting is done. I don't normally use this method, as I don't particularly care for it (besides, it doesn't wear as well on the edges as a traditionally bound quilt .. but since this was most definitely a wall-hanging, durability wasn't a consideration). However, this was the only way I was going to get that nice scalloped edge, since I would be able to follow the stitching line of the Celtic design.
Then I was left with the quilting problem .. how to do it. I knew I wanted motifs that were contained wholly within the empty blocks while the rest of the quilt was stitched-in-the-ditch. In previous attempts at free-motion motifs, I had traced the design onto very thin paper and pinned the paper to the quilt. After stitching right through the paper, I would tear the paper away. The problem I would encounter was that the pinning wasn't too secure and the paper would shift. To circumvent that problem this time, I used basting spray! Boy, did that work great! [big, pleased smile]
I am pleased to say that the top was done entirely from my stash. However, I did buy the backing fabric to coordinate, but since I had a gift certificate to my LQS, I felt as though I really hadn't spent any money on the quilt at all. (We are *not* going to discuss the other fabric I bought at the same time for *another* class I am currently taking. [sigh] What is the saying about the road to hell is paved with good intentions? [grin]).
The label was printed out & sewn on .... and this puppy is done! So, it's gone from a non-existant project, to a new class to a UFO to .... FINISHED :-) woo hoo!
The handkerchiefs that I used in the pockets came from various sources: two came from my Dad's oldest sister; one came from Portugal and was given to me by my Mom's oldest sister many years ago; 3 came from my MIL (who edged one of them as well as the central crochetted medallion, when she was 16 years old); 2 I recently bought at an antique shop when I was vacation (one of which is the most *gorgeous* light weight silk and equisitely embroidered); and 1 came from the depths of my stash and I can't even remember buying it. It was with some regret that my Dad was unable to find any handkerchiefs among the items he kept when my Mom died, but then .. who was to have known?
This quilting wall hanging now adorns a wall in my sewing room.
This pattern is part of a compilation of quilts in a paperback book ,"Class Act Quilts: 18 Eclectic Quilts - Teachers and their students", published October 1996, compiled by Ursual Reikes. (ISBN 1-56477-1512)