My Second Forever Project
a hand-pieced Cathedral Window
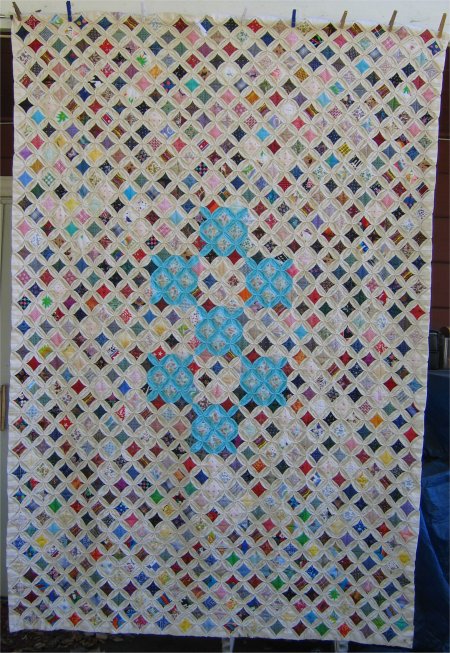
Date started: September 2000. Date finished: July 27, 2007. Wooo hooo!
 |
 |
First off ..what the heck is a Forever Project? Well, it's something creative and productive I can do with the otherwise dead time I spent sitting around waiting for something else to happen, usually in conjunction with my kids' activities. Like, waiting for a skating lesson to end, waiting for a dental appointment to be over, sitting at Little League games, being a passenger on a road trip ... you get the idea.
I could read a book during those times, but at the end, what do I have? Another book read. Now, I love reading. I read a lot, but after 37.593 books, what's another book? And, other than enjoyment (which is not to be denigrated by any means!), what do you have to show for your time?
Enter the Forever Project.
Now, why is this the "second" Forever Project? I originally came up with the concept around the early 1990's when my oldest daughter (then in elementary school) enrolled in roller skating lessons. I had previously purchased a kit for a crewel embroidery unicorn, which languished (much like my poor, neglected hand-pieced sampler quilt) for a very long time. I was going nuts sitting at the roller skating rink waiting ... waiting .. waiting .. for the lesson to be over. It occured to me that I could be Doing Something Useful during this time .. and hauled out the unicorn pillow. To make a long story short, when the set of lessons was completed, the unicorn pillow got packed away and ultimately rediscovered many years later, when my youngest daughter started cheerleading in middle school. I finally finsihed my oldest daughter's unicorn pillow during my youngest daughter's games, much to my delight. (Pictures of the long-suffering unicorn pillow will be posted in the Needlework section of my webpage .. eventually).
Once I was firmly in "Forever Project" mode, there was no way I could sit through all those youth football games without working on something. See, although I really like football, I wasn't interested in the youth football games at all, as I didn't have a son involved. My interest was because I had a cheerleading daughter ... and there were downtimes between their cheer routines.
I thought about what kind of new Forever Project I could work on. It needed to have some very specific qualities.
 A hand-pieced Cathedral Window seemed to fit the bill .. it was a quilt that I had long admired, but never wanted to devote hand stitching time at home when I could have been working (more quickly) on my sewing machine.
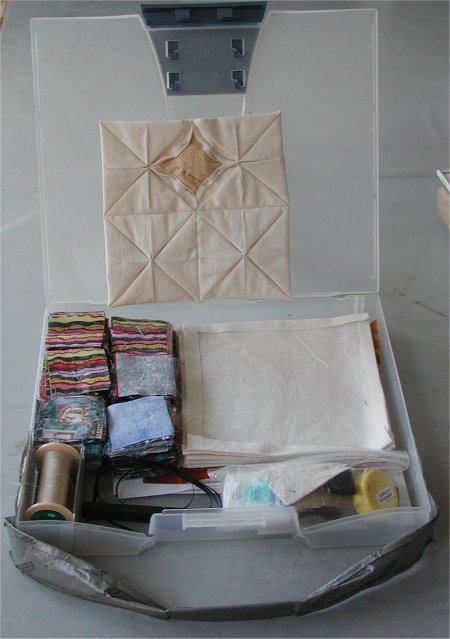
I put together my Forever Project kit:
The picture on the left is my Forever Project box. I got the box itself at Joann's. Mr. Pirate, in one of his Creative Uses of Duct Tape modes, made a handle for me.
As I steadily worked on the individual squares, I became rather proficient in whipping one out about every 20 minutes. Four squares made a block. Nine blocks to a row. Ultimately the finished quilt will have has 12 rows. That works out to 36 blocks per row or 432 total Cathedral Window squares.
As of late 2004, I'm about half-way through the quilt. I'm in no hurry. In fact, if I never really finish the quilt, I won't be disappointed. The purpose of the quilt was to provide me with a productive downtime project ... not necessarily ever complete anything! In fact, my girls are somewhat aghast at the concept of the Forever Project actually becoming done. I had to reassure them that I had more Forever Project ideas, so they needn't worry. :-)
Status Report: August 2003
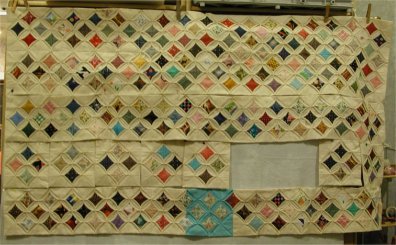 Here's a picture of the quilt as of August 2003. You can see that I've just pinned some rows to a backdrop so that the picture could be taken. You can clearly see where the rows are sewn togethe because the colored window pane of fabric hasn't been sewn in that spot yet. Although I do keep track of when I have 9 blocks to sew into a row, I have no schedule of when I sew the rows together .. it's just whenever I feel like it. One drawback to having the rows sewn together is that the quilt is getting bigger and hence, is losing its portability: it's just too awkward to haul around. The advantage is that I can see my quilt growing!
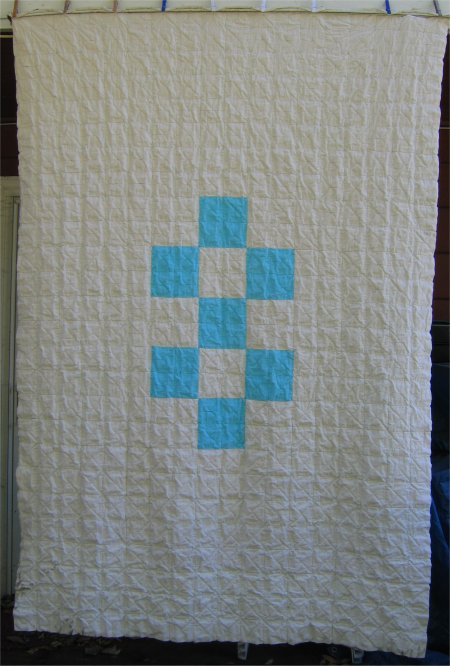
You might wonder why I have some turquoise blocks in the quilt. The short answer is that the turquoise solid and the floral window pane came from my mother's stash. The longer answer is that I knew that a Cathedral Window quilt took lots and lots and lots of fabric to make the individual squares. I wanted to do a test run to make one before I committed myself to the entire quilt. The first one went together so easily that I made as many as I could from my mother's fabric but I could only make 7 turquoise blocks (28 squares). Then, not wanting to waste these blocks, I designed the above layout to incorporate the 7 blocks in a prominent spot. Only then did I calculate ... and buy ... the NINE yards of muslin my figures said I needed for the rest of the squares!
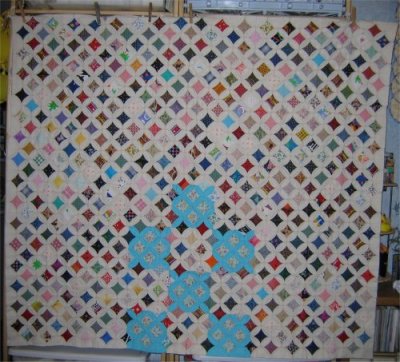 Status report: August 2005. Two years later, here's a picture of what the top looks like. It's halfway finished now and it's really, really heavy! During the earlier part of this year, I was examining my stitches that hold the rows together. Being self-taught for this quilt, I was never quite sure what stitch I should have been using, so I ended up using a ladder stitch. Unfortunately, when I put some firm pressure on the quilt, I could see substantial strain on the stitches. I could just imagine the first time Mr. Pirate tugs on the quilt in bed, all the stitches would go "pop-pop-pop"! After thinking about it for a while, I realized I should have been using a whip stitch to connect all the rows. Therefore, I have put working on the individual blocks on hiatus for a while, as I work on the seams on the back. I'm just whip stitching right over my previous stitches. I had been concerned that there would be an unsightly ridge from the whip stitches, but my fears were unfounded. The newly re-stitched seams appear very substantial. Luckily, I discovered this problem while only half done! I would have been discouraged if I had thought of this problem when all the squares were finished. :-)
Status Report: July 2007
 Do you remember a commercial from ages ago that showed a man eating a humungous plate of spaghetti and moaning at the end that he couldn't "believe he ate the whole thing'??
Well, I can't believe that I have FINALLY FINISHED my Forvever Project #2. According to my notes, it has been nearly 7 years in the making. My CW is "about" a twin size .. more or less .. mebbe a little narrower .. but I'm so tired of working on the darn thing that I'm simply calling it *finished*. :-) This is the back of the quilt.
I'm pleased to say that my fears about it decomposing when I washed it were unfounded .. my stitches are firm and the held through a soak, a gentle-cycle wash and the dryer. *whew!* My last fear was that I was going to discover I'm a lousy hand-stitcher!
This is an incredibly heavy quilt, as the warmth comes from the multiple layers of folded fabric rather than a batting. If you ever wanted to literally smother someone with love, this is quilt to do it with!
This quilt is for me! me! me! (or at least, Mr. Pirate & me) :-)