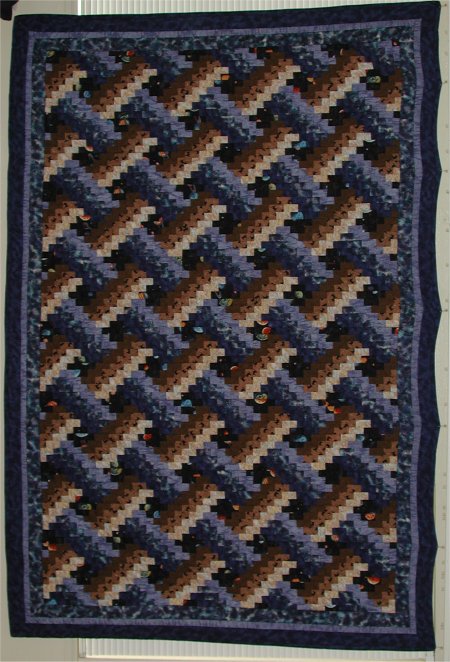
Weaver Fever
looks like Woven Ribbons, doesn't it?
Date made: summer 1996


This is another quilt made for one of my far-flung computer friends. I needed some "manly, macho" colors and fabrics to use in this quilt cuz the recipient is such a manly, macho-kinda guy. As I thought about it, I decided that I would take inspiration from his profession at the time .. a USAF pilot. From his cockpit, he sees the blue of the sky, the brown of the earth and the planets in the black night sky during night flights, so those colors made up the woven ribbons of his quilt. The reverse side reflects the stars in the heavens above.
I had bought a pattern book, "Weaver Fever" by Jackie Robinson showing the illusion of woven ribbons and I was itching to make it. Problem was .. I really didn't need a quilt for myself ... but an upcoming birthday was the perfect excuse! :-) Another problem was that, true to form, I found the book about 3 weeks before the birthday, so once again, I was involved with massive amounts of sewing time. But, owing to the fact that I scrupulously avoided all Domestic Goddess duties for the duration of the quilt construction, I finished the quilt in time to mail it to the recipient .... as long as I used 2 day delivery. [sigh] I did. Was it worth the extra cost? I dunno ... I'm still waiting for some proper appreciation! [Men are so clueless about that sort of thing! [grin]


This quilt uses the bargello-style of construction.
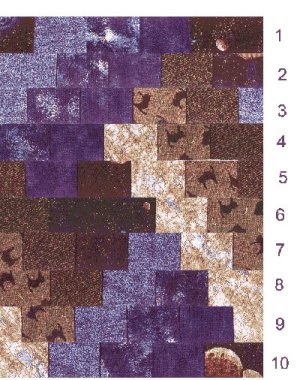
It uses only one block throughout the entire quilt, each one made up of 10 strips of fabric.
Each strip is a cross-cut of long strips of fabric sewn together in a specific order.
A total of 3 browns (light, medium, dark), 3 blues(light, medium, dark), and a black planet-motif were used in each block.
When the blocks are abutted with each other, if correctly sewn, the resultant pattern is of the woven ribbons.
The borders were of the blues.
 The back of the quilt is a light blue with gold metallic stars.
Ah .. the borders. [sigh] A lesson was learned on this quilt. I like mitered borders. They look more "finished" than borders that are butted up against each other. And mitered corners aren't really that difficult ... there's an easy technique to make a perfect miter corner every time. ::ahem:: Notice that I said a corner. Well, in this quilt, there are 3 borders; hence 3 strips to make a miter corner in. Unfortunately, it was after this quilt that I learned that the way I did this particular border was not the way it should have been done.
I rather think that I had not attempted multiple borders with mitered corners before, because I attached each border separately ... i.e. making all the miter corners for each border as the border was being sewn on. I discovered it was extremely difficult, if not damn near impossible to correctly match up each border's mitered corners with the previous border. [sigh] It was very, very annoying.
It was only later that I found out that what I should have done is sewn all the border strips together first, creating one wide border strip THEN do the mitered corners with just that one wide strip. [sigh] As a result, the corners on the quilt aren't really acceptable but the quilt had already been given away .. so live and learn.