Sashed Disappearing 9-Patch
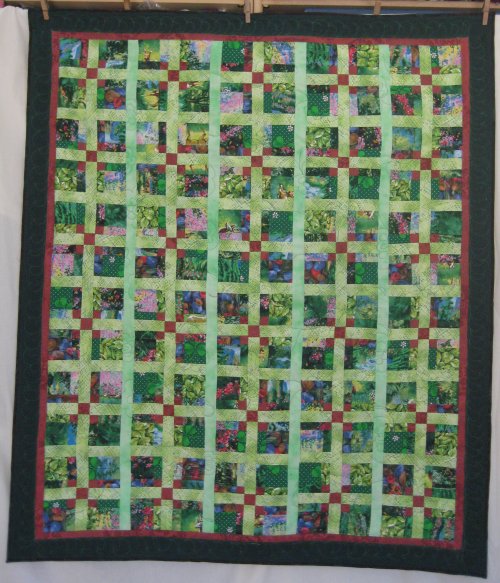
size: 42" x 50"

From a local Freecycler, I got a bunch of fabric pieces; they looked like sales representative samples in that they measured 13" x 17", all in the same line but different colorways and companion prints. They weren't anything that I would have purchased myself but certainly wonderful for charity quilts .. especially since the fabric was free. :-)
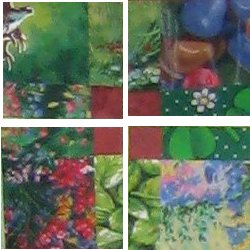 From a blog at Piece-n-Quilt, I saw a really cute layout that took the Disappearing 9 Patch segments and separated them with sashing. I liked the layout and thought it would be a good choice to use my fabric sample pieces since the sashing would s-t-r-e-t-c-h the limited fabric I had to make at least the minimum size quilt requested. Only thing ... the blogger used a charm pack (5" squares) to make her D9P blocks, which made the *segments* themselves still quite large. By comparison, I cut my fabric into 2-1/2" squares to make *my* D9P blocks. My segments were quite small. [wry smile]
Her quilt needed only 16 of her segments (i.e. 4 D9P blocks) to make the center medallion of her baby quilt at 38"x38". I made 108 segments (27 D9P blocks) to make my toddler quilt at 42"x50". I felt as though I was making D9P blocks *forever*. [imagine me slogging my way through a never-ending forest of disappearing 9-patch blocks]
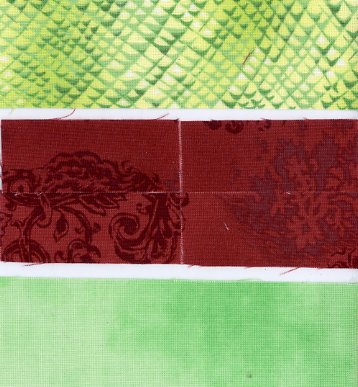 Because I only had 7 fabric sample pieces and needed 9 to make the 9-patch, it was necessary to add 2 pieces of fabric from my stash. I added the dark red center fabric and an additional green print.
I'm trying to use the fabrics in my stash so I'm not spending additional money for these quilts. I needed a sashing fabric and just didn't think that a light/white colored one would be too practical for a kid's quilt. While black sets off colors so wonderfully, personally, I just don't like using a lot of black for kid's quilts either. What I did find in my stash was a textured lime green (looks rather like snake skin, huh?) that worked.
Since I oriented the D9P blocks so the red center pieces were "together", I thought that putting another red square at the sashing intersections would be interesting. It turned out OK but not as dramatic as I thought. Unfortunately, as I was making all the sashing pieces with the intersection squares, I realized that I was rapidly *running out* of the sashing fabric. Since this was stash fabric from who-knows-when, getting more was out of the question. Diving back into my stash, I pulled out another green mottled fabric that wasn't lime green at all, more of a deeper sea foam, but it was the closest I could get from what I had. That fabric was used as the alternating vertical sashings. It turned out better than I had hoped. :-)
Just the D9P blocks + sashing was still undersized for the charity (they have a minimum size they like), so I added a very narrow inner border in the dark red fabric (same as was used in the center of the disappearing 9-patch block) and another wider border of very dark green fabric.
Then came quilting time. This can really be the cause of considerable angst. What to do? What to do??
Well, in this case, I had just received a set of quilting design books .. a 3 volume set by Darlene Epp: "Pocket Guide to Freehanding". I had practiced quite a few of the meandering designs and was pleased with my doodling. The Disappearing 9-Patch part of this quilt is very busy; no quilting is going to show up. An overall meander would be a perfect quilting choice and I decided to use the "Rose 1 Meander" motif inside the narrow red inner border.
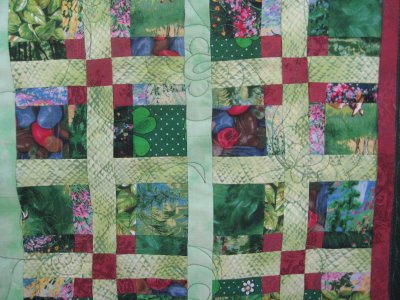 I was with some trepidation ... and little bit of exhilaration! ... that I began to free-motion meander the rose design. Before I bought these books, never in a million years would I have thought I could have done anything like this before! But the designs are so well drawn .. each building on the previous design .. that before you know it, you've done some pretty doggone snazzy stuff!
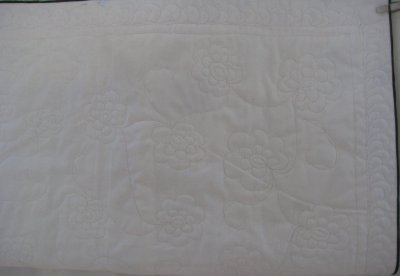 My main concern was spacing the meander roses evenly across the quilt. I was soooo right: all the prints in the blocks made it darn near impossible to see the quilting. Look at the picture on the left. Do you SEE the quilting? This meant that it was difficult to see where the previous designs were and where to put the new designs. But, I think I did well, judging from the spacing on the back, which you can kinda/sorta see in the picture on the right. (It's not easy to photograph light colored fabric and get any sort of contrast.) Perhaps I did quilt them a *bit* farther apart than I should have, then again, maybe not.
A stitch-in-the-ditch defined the narrow inner red border. I was concerned that without it, the area would be too puffy in relation to the meander rose in the interior and the border quilting. I'm still not terrific when it comes to stitch-in-the-ditch, but I'm sure getting a lot of practice!
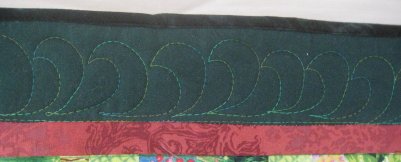 And what to put in the border?? The dark green border is 1-3/4" wide. It definitely needed something but obviously nothing too wide. I turned to Sally Terry's "Hooked on Feathers", an absolutely delightful, no stress way of making casual feathers. I used the seamline next to the narrow inner red border as the "spine" and did feathers all the way around the quilt.
Although I could have stitched the side border feathers in short segments, as that area of the quilt was exposed, and avoided turning the quilt, it's really no big deal (to me) to turn the quilt. It really makes doing those side borders easy since you once again have one long stretch to work on. :-)
All in all, I think it turned out nicely and I'm more pleased with the final result than I was when I was trying to figure out how to make do with fabric shortages. :-)