New Wave
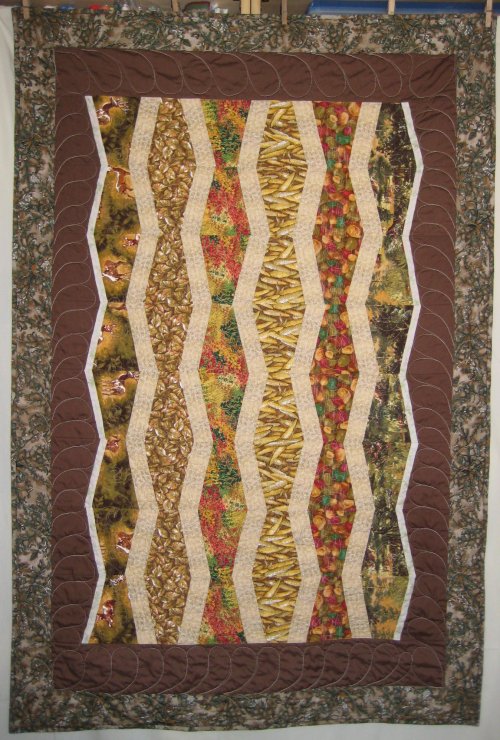
size: 38" x 58"

From a local Freecycler, I got a bunch of fabric pieces; they looked like sales representative samples in that they measured 13" x 17", all in the same line but different colorways and companion prints. They weren't anything that I would have purchased myself but certainly wonderful for charity quilts .. especially since the fabric was free. :-)
The Freecycle fabric for this quilt is the 6 colored "waves" and the backing. I supplied additional fabric from my stash for the light colored strips between the waves, the borders and the binding.
Apparently there is a "new wave" of enthusiasm spreading across the quilting internet these days over Elizabeth Hartman's "Oh, Fransson" blog. :-) (there's a pun there .. just wait for it.) This past March, she posted a tutorial for a striking new layout, which she calls "New Wave". [oh! there is is!] Deceptively easy, you'll create an awesome quilt in no time. She has directions in a PDF document on that page
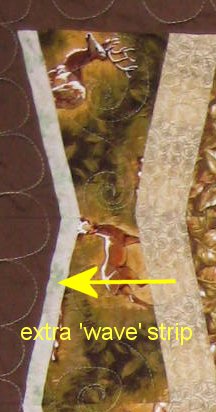 I chose to add an extra, narrow 'wave' to the sides of my New Wave quilt. Actually .... truth be told .. I had intended on putting that extra, narrow border all around the Wave portion, but I got distracted after the side waves were sewn on. It was a couple of days later that I was able to return to the quilt; I had forgotten about my original intentions and so promptly sewed on the two outer borders. It wasn't until I hung it up on my design wall that I realized my omission.
::sigh:: Well .. "sigh" isn't exactly what I said because I knew I wasn't going to remove the borders I had just sewn on. And why? Because, although frog-stitching is annoying enough, if that is ALL the problem is, I would do it. But if the outer two borders came off and the extra, narrow 'wave' border was put on the top & bottom ... it would mess up the measurements of the outer borders and I just did NOT want to deal with cutting new pieces. So there.
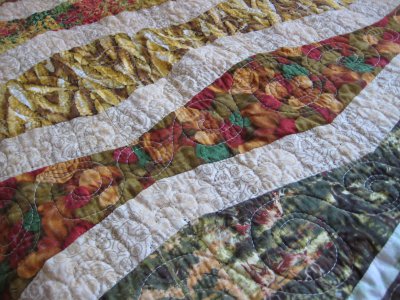 I loaded this quilt sideways ("railroading" it) so that the waves would be horizontal. Not only would this put all the major seams parallel to the rails on Lizzie, it would allow me to quilt those waves in a single pass. I wasn't quite sure what I wanted to do in the borders, so I proceeded to work on the waves first.
The Freecycle fabric waves, which were the focus fabrics, were done in a free motion spiral, which changed direction in every wave. I have spiral templates that will allow me to make absolutely, no-doubt-about-it PERFECT spirals ... but I have yet to master using those templates. They really are slicker than cow slobber and the instructions show you how to do FANTASTIC stuff with them but I'm not feeling the love. Hence, free motion spirals.
And ya know what I discovered? Heck, I'm not so bad at making free motion spirals! Sure, they aren't the perfect specimens that the templates would produce but they aren't half bad! :-)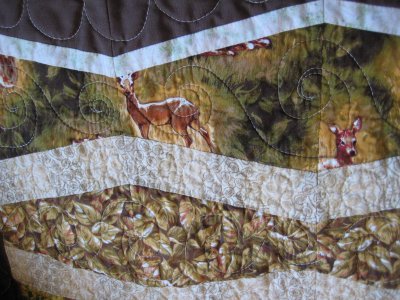 The quilting on the light colored fabric, used between the waves, was another design from Darlene Epp's "Pocket Guide to Free Handing", Borders and Sashes. Gosh!! I LOVE LOVE LOVE these books! The design I chose is a nested sea shell sorta of design and actually goes nicely with the spirals. As I was doing the sea shell design, it seemed to be an awfully familiar muscle movement. Then it hit me ... these sea shells are simply Sally Terry's "Hooked on Feathers" but don't touch each other! Awesome! :-)
With the spirals looking rather like waves and the sea shell designs, it occured to me that I should have had seashore fabric instead of Southwest and woodland designs. :-) Or chosen other designs. ::shrug:: :-)
But the borders ... oy .. what should I do in the borders??? Then I remembered that one reason I am doing these crisis nursery quilts is to provide me with a low-stress venue for trying new things ... working outside my comfort zone. And right now, being such a new longarm quilter, my comfort zone is Very Small. While I *am* trying to do my best on all the quilts I do, if I don't experiment someplace, I won't ever stretch my boundaries. I have discovered, for me, that just practice pieces (plain muslin stuff) doesn't really work too well because plain muslin is not a "real" top. And if I'm going to be quilting a real top, then I should DO something with the real quilt ... hence the crisis nursery and we have come full circle to the first sentence! :-)
And let's be realistic ... as long as the quilting holds together, the kids aren't going to be critical if the quilting isn't award winning. Bobbles, mistakes, missed spots, designs that didn't work out well are all going to be OK.
I had previously done a LOT of the "Hooked on Feathers" method and just loved it. I mean, really LOVED it. I can honestly see me using this as my fall-back design for feathers. But if I only stay with Hooked on Feathers, I will never even become mediocre at formal feathers. Therefore ... taking courage in hand .... I decided I would practice formal feathers in the borders. Furthermore, there was an instance where you used the seam line as the spine and quilt your feathers on either side. This seemed a perfect time to try.
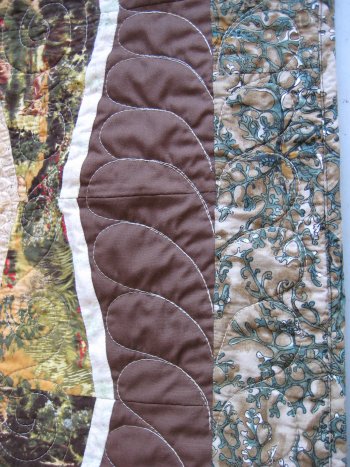 I learned that part of this worked and part didn't. What didn't work: the feathers in the large solid brown border. Why? I think I didn't curve the feathers enough. Also, I learned that a BIG area to quilt one design in is difficult. It's easier to quilt small(er) designs than large designs ... at least free motion. The feathers in the large solid brown border look like they are verging on the dread "sausage" look. ::sigh:: Because the fabric is a solid color, EVERY doggone thing you do on it stands out ... so if your execution is doggone perfect, all of your mistakes show up.
Which leads me to the other thing that didn't work out well with this idea ... the other border fabric. The fabric itself is Fabulous. I love it. It works well with the rest of the quilt. BUT ... precisely because it IS a PRINT, it hides the quilting. If you ever want a fabric that is forgiving of your quilting, use a print. (One huge reason in favor of using a busy print for the backing ... kinda like the frosting on a cake .... it hides a multitude of sins.) And yup, the print sure enough does a marvelous job of hiding the other side of the feathers. Instead of being a border of feathers, it just looks like some weird sausage things hanging around.
Up close, as the picture shows, you can SEE there are two columns of feathers and they look pretty good. Further away? Nope .. the feathers in the print disappear. I still like the look of the two different fabrics for the outer borders but think the feathers wasn't a good choice for quilting.
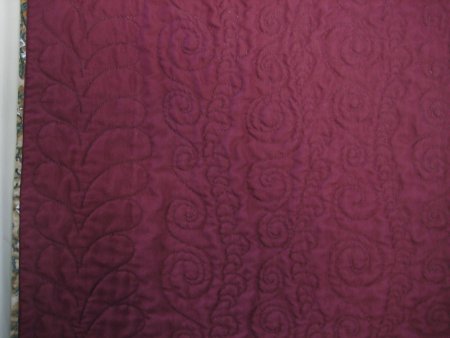 What worked .... look at the backing! Specifically, look at the feathers in the backing! When your eye isn't distracted by the color separation of the borders, those feathers don't look nearly as bad as they do from the front. The texture from the quilting in the wave segments really looks wonderful. I particularly like the way the spirals turn left in one wave and turn right in the next wave.
I did chicken out when it came to reversing the direction of the sea shells .... my muscle memory was doing quite nicely, thankyouverymuch, doing the one direction and I thought that experimentation with the feathers in border was enough excitement for one quilt. :-)