Flower Blocks
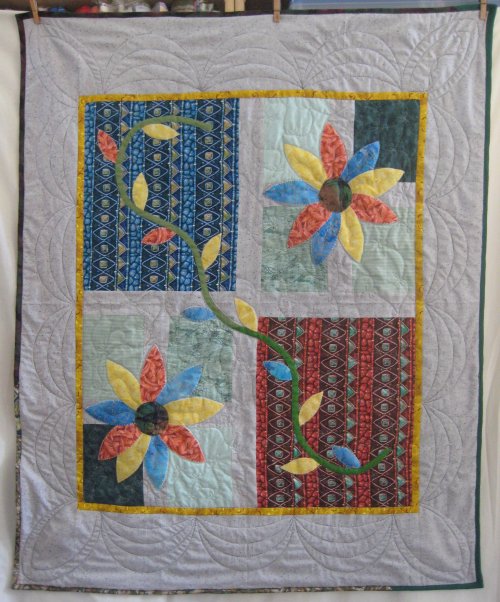
size: 38"x46"

From the charity quilt fabric I obtained from my Freecycle group (a quilting associate was de-stashing), there were some odd-sized pieces, 12-1/2" x 15", that were obviously from the same fabric line. I'm thinking they were salesmen's samples. This particular line was distinctly Southwestern in flavor.
I pulled 2 of them, one a deep turquoise colorway and the other a deep coral colorway. Both had accents of greens and yellows. I wanted to use the prints as the focal point without needing to cut them up. I felt their impact would be diminished if they were used as smaller pieces.
In my mind, I was thinking along the lines of a color-block layout. Something simple, yet effective.
Something along the lines of this
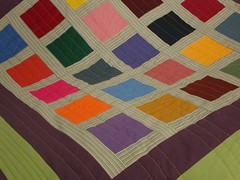 from Kirsty of "Cast On Cast Off"
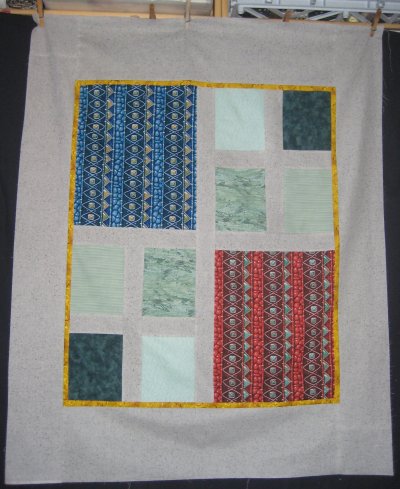 But not exactly. Remember .. I didn't want to cut up the focus fabrics so I was stuck with their relatively big size.
Still thinking on the color block layout, I pulled some greens from my stash and made a sashed 4-patch the same size as the focus fabrics. All those 4 blocks were put together in a GIANT 4-patch surrounded by a narrow accdent border and a wide outer border.
And the result was .... BORING.
Geez, I didn't like this at all. I was really disappointed .. but what exactly did I expect, when I didn't have a clear plan in mind to begin with?
Some people can simply whip up fantastic designs on the spot, on the spur of the moment. Not I. So, I folded it up and put it away for a while.
And then ... serendipity came knocking at my door, in the guise of the "Leaves Galore" ruler from Sue Pelland Designs. This clever ruler allows you to make pointed oval leaf shapes very easily, several at a time from a width of fabric. Not just leaves, but these shapes can be used for other designs as well ... such as flower petals or butterfly wings.
I had been mulling the idea of raw edge applique in my mind for some time ... this being an incredibly radical idea for me. You see, applique has been drilled into me as being a turned edge shape that you then either hand or machine stitch in place. It's getting that turned edge that's the sticking point. There are LOTS and LOTS of different techniques for achieiving a turned edge ... none of them fast and easy.
But this raw edge thing ... hmmm ... a fused backing holds the shape to the background and machine stitching around the edge completes it. It seems like cheating. :-)
What's a little cheating to a pirate? :-)
I ordered the ruler and when it arrived, I promptly hauled out my stash of fusible webbing and cut out my leaf shapes. The idea I had in mind this time was to use the turquoise - coral - green - yellow colors as a ginormous flower applique. Eventually I settled on a daisy-like design in the 4-patch blocks; they would have tended to get lost if put on the print fabric.
But the two flowers by their lonesomes looked pretty pathetic. So sad. :-(
I needed something else using those same accent colors in the focus fabric squares to balance the flowers. So, a wavy vine was born (single fold bias binding from my stash) and leaves from the Leaves Galore ruler.
Finally ... it looked good to me! [Aside: *after* I finished quilting and really looked at it, it occured to me that I could have extended the vine out into the wide border for a more artistic look, instead of confining it inside the narrow accent border. I think, now, that would have given it a better 'look' ... but thinking inside the box .... oh, that's just me! :-) ]
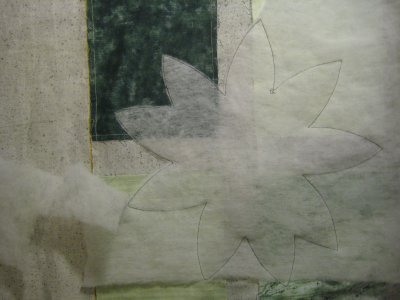 Furthermore, I remembered a faux trapunto technique shown by Leah Day (she of the 365 Filler Designs). Since I was going so far afield (for me anyway) with the raw edge applique technique, why not add a little dimension and poofy with trapunto? So I did. :-)
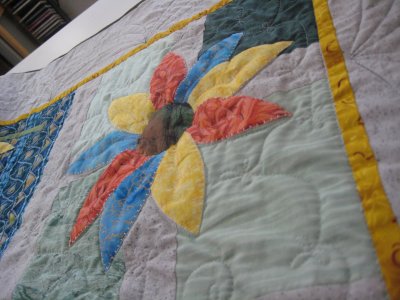 Here you can see the batting that I stitched in place on the wrong side of the fabric. I used spray adhesive to secure the batting to the wrong side of the fabric and did my outline stitching around the outside edge of the fused flower petals from the right side. Once the stitching was done, I cut away the excess batting, leaving just the batting inside the flower. When the quilt top was loaded onto Lizzie, another outline stitch was done around all the petals and flower center. It is this second stitching that causes the trapunto effect.
The perspective photo (on the right) attempts to show you how the petals and the flower center are puffier than the background fabric they are stitched on.
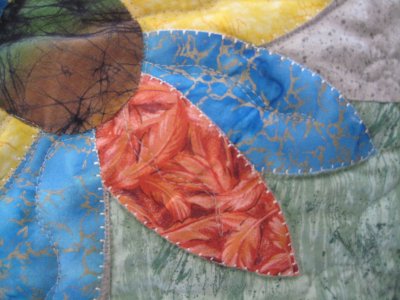 Now about that raw edge applique .... I still wasn't sure this was kosher, if you know what I mean. It just seemed way too doggone easy. I stitched down the edge with a narrow buttonhole/blanket stitch in a thicker ecru thread - a small amount of contrast. (I know I could have also simply done a straight stitch around the perimeter.)
The vine stem and flower centers were stitched with a polyester monofilament thread, since I didn't want that stitching to show.
Once all that stitching was finished, the top was done.
Now it was time to quilt.
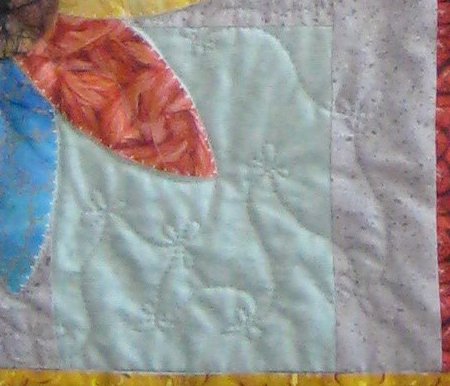 I did an embellished meander all over the giant 4-patch center. The embellishments were little 3-petal flowers that I learned from Darlene Epp's
"Pocket Guide to Freehanding". (I looooooooooooooove those books!).
An outline stitch was done all around all the applique shapes. I have a nifty tool to help me with close-in stitching, the Appliquide by Deloa Jones.
But it still takes practice-practice-practice to do a good outline stitch. I'm still at that first 'practice' stage. :-)
Nothing was done in the narrow yellow accent border ... one inch is too narrow (I remember *that* problem from the Sawtooth Stars #2 quilt!)
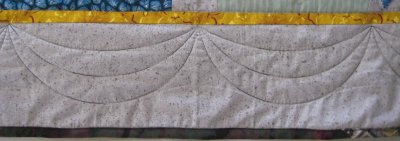 But the outer border was wide enough to do something interesting. Meandering feathers? Maybe .. I like the look but they still intimidate me.
WAIT! I know! *Swags*! I loooooooooooooooooove swags! I love them even more once I had obtained a most excellent swag ruler from Constantine Quilts. For these swags, I used her 8" swag ruler. With this one ruler, there are *four* different swag depths you can stitch. You get FANTASTIC swags every time. (She also has a 5" swag ruler, which I have on order, which allows you *six* different swag depths. I can't wait!) The corners were done with her 8" no-frills oval ruler.
Honestly, I swoon with delirious ecstacy when the swags are finished. :-)
The binding was done with several pieces of different shades of green double fold bias from my bias stash. Yes, honest to goodness, I have a bias stash! I looooooove making bias binding.
I use the continuous tube method and in no time at all, I can have enough binding for a quilt. I know that it takes me one hour, from pulling out a single fat quarter through marking it through sewing it through cutting it, to make a shade over 5 yards of 2-1/4" bias in one long continous strip. One hour. That's not an exaggeration because I timed myself on one occasion, just because I was curious. And there's no separate little bias strips to sew together either. (I *hate* sewing those strips together. I can never figure out which way the seam is supposed to go to get a straight line of bias.) So, whenever I need to make bias, I always make way more than I need for the current project. That leaves me with a bias binding stash. :-)
Blatant tooting of my own horn: were you aware that I have a most excellent tutorial for making continuous bias binding? Yep! For sure, I do! In addition to the online tutorial, I have a PDF version for you to download for your very own copy.
Blatant tooting of my own horn #2: now that you've sewn your binding to the quilt, how do you sew that last seam? Do you just tuck the ends into each other? OH YUCK! Surely, you've noticed that obnoxious LUMP? Well, once again, I have a most excellent tutorial on how to sew that last seam, joining the beginning and ending ends of the binding, in a seam that is *exactly* like every other seam in your binding ... which is to say, it's a diagonal seam, absolutely FLAT ... and it EXACTLY fits the distance between the starting and ending point. It works every time. I kid you not. And you do NOT need any specialty ruler to achieve this marvelous result! Like the bias binding tutorial, there is the online version and a PDF for you to download for yourself.