Rail Fence variation

size: 37" x 48"

I was cleaning out my scrap boxes and generally tidying up my sewing room. One of my scrap boxes held orphan blocks, experiments and bonus blocks (created as a leftover from a larger block). As I was sorting through the box, I came across LOTS of half square triangles made with a vaguely Christmas colored print and white. There were actually enough of them that I could DO something. But what?
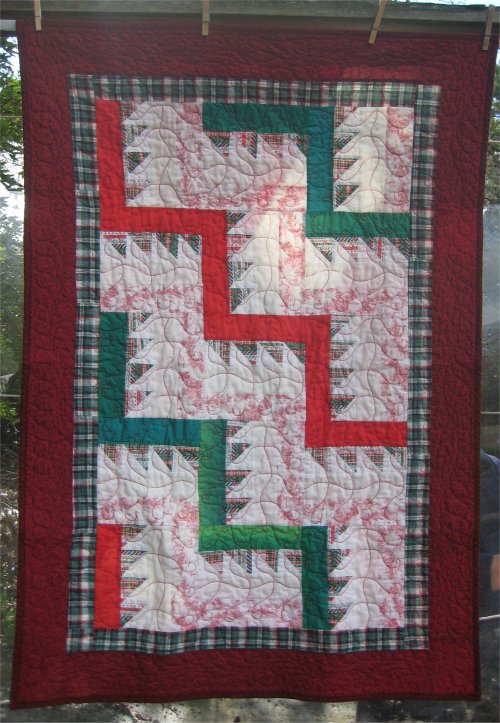
I either happened to come across this layout or I remembered it ... a standard Rail Fence but substitute pieced blocks for one of the rails. Since the colors of the half square triangles where red/green/white, I picked a vibrant red solid, an ombre green, a solid white and a red/white toile print for the other rails.
This gave me enough blocks for the interior of the quilt. A border of red/green/white plaid of homespun fabric surrounded all the Rail Fence blocks. A final deep red fabric made up the final outer border and binding.
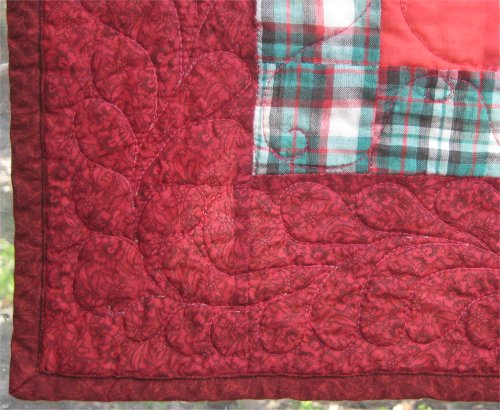
 I wanted to experiment with feathers in the border for this quilt. Feathers tend to be intimidating. If you don't do them correctly, they can end up looking like sausages or hot dogs or something else equally non-feathery. I've made these kinds of non-feathers, so I know. :-) To help disguise any potentially misshapen feathers, I used a red quilting thread in the red outer border.
For reference, I used Carla Barrett's tutorial on feathers and that helped enormously. There are many techniques to make feathers, which is good because you'll find a method that will work for you. I found that I get the most consistent feathers if I stitch the spine from top to bottom, then make the feathers by "coming over the top". With this technique, you are creating the feathers from the bottom going towards the top of the spine. When I reach the top, I either backtrack down the spine or tie off. In either case, I want to start the feathers on the other side of the spine from the bottom. I know that you can just make a U-turn at the top of the spine and come back down the other side .. but the feathers I make doing it that way just don't turn out as nicely.
To make my job easier and to ensure that I'd have nicely spaced feathers, I chalked the spine first. I tend to quilt all the way to the edge of the top .. and when I sew the binding on, the binding covers part of the quilting at the edge. I didn't want that to happen with my feathers, so I chalked another guide line 3/4" from the raw edge. This gave me enough room for the binding and breathing space at the edge for the feathers.
I think these are the nicest feathers I've done so far! Not to say that they are the BEST feathers ever, but I'm definitely getting better! As they say ... "practice, practice, practice!".
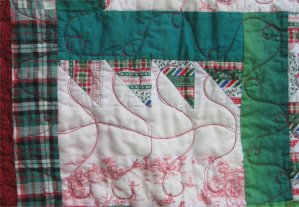
Going with the tried and true, I used Carla's Swirl for Borders in the narrow plaid border, and in the red & green rails.
 That left the Rail Fence blocks themselves. ::sigh:: When I drew this design on my plastic overlay, it didn't look this bad; it looked reasonable .. why else would I have stitched it? I'm not sure if I had anything specific in mind other than quilting over 3 rails. But I'm definitely not pleased with the final effect.
In retrospect, I suppose what I should have done was
1) NOT USE RED THREAD! I don't know why I balk at changing threads on Lizzie and
2) stopped, ripped out what I had done after the first block and reassessed. That would have been the smart thing to do.
Obviously, I'm not smart. :-)
I think a design that zig-zagged through these rails would have been much more pleasing to look at. But that's water under the bridge and I'm not going to correct it. I will, however, remember this for Next Time.
A while ago, I bought an entire bolt of 108" wide muslin. I *really* like having whole cloth backings; it makes life easier for a longarm quilter. The problem with seams in the backing is that they provide bulk. That's obnoxious. If the seams are part of pieced blocks, that's MORE bulk. If the seams are vertical, that seam produces a pronounced "hill" as the backing is rolled up. Vertical seams also seem to have more tension on them than the surrounding unseamed fabric and as a result, that seam is "tighter" than the surrounding fabric. Sometimes, vertical seams can be avoided by loading the quilt sideways .. which put that seam horizontal. A horizontal seam lies flat on the roller and doesn't have any extra tension on it. Which is why, if you must have seams in the backing, horizontal seams are better than vertical seams.
I've also gotten past the point where I HAVE to have an interesting (and expensive) fabric as the backing. Yes, I've done that many times in the past (and might even do so in the future), but honestly ... how often do you look at the back of a quilt? Muslin is much less expensive than quilting cotton, washes up nicely AND I tend to wait until I have a 50% off coupon! :-) The only drawback is that since it is a solid fabric, all of your quilting stitches do show up. As do all of your bloopers. :-)
But, I repeat ... how often do you look at the back of a quilt? :-)
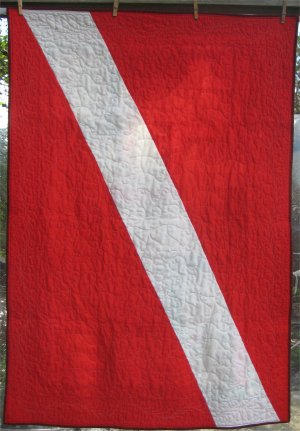
HOWEVER, all that being said, for this quilt, I didn't use muslin. ::chortle:: You though I was leading up to that, didn't you? :-) What I did have on hand was more of the vibrant red (and I do mean eye-searing red) fabric that was used as one of the rails. Unfortunately, while it was long enough, it was quite wide enough.
Hmmmm. If only I could s-t-r-e-t-c-h the fabric a bit. WAIT!! I know! I'll just insert a diagonal strip! Remember all the verbage at vertical and horizontal seams in the backing? All of that can be completely eliminated if the seams are diagonal. Think of when you diagonally seam binding ... when the binding is folded, you never have a seam right on top of itself; the diagonal seaming spreads the seam in opposite directions. Same with diagonal seaming of backings ... as you roll the backing onto its roller, you never have a seam directly rolling on top of itself and you don't have to be concerned about keeping a horizontal seam in that orientation.
 And, if you're going to insert a diagonal strip of fabric, let's not be squeamish about it. Be bold! So, yeah .. I used a highly contrasting fabric. :-)
For whatever reason, I once again forgot to check what color thread was in the bobbin. When I needed to advance the quilt to the next area to be quilted, guess what color thread I discovered was prominently featured on the RED backing? Certainly not red. Gosh no. Off-white. Geez, Louise ... let's have something that really contrasts with the backing, huh? Well, at least it wasn't *black*. ::head thunk::