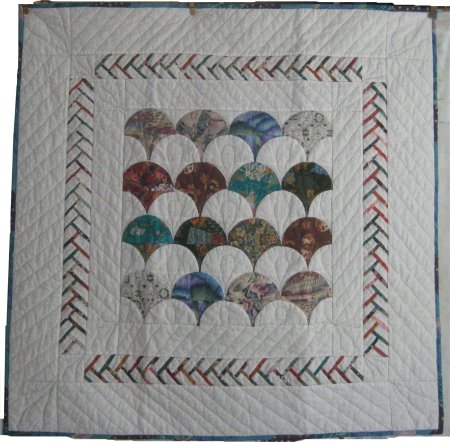
 1. Asian Clamshell. I used the clamshell block from EQ5 and some of my Asian motif fabrics for the clamshells with a white Tone-on-Tone print for the borders and background. The center medallion is the Asian clamshells. The next come a series of 3 borders in different sizes. The first border is the white Tone-on-Tone background fabric, next is an augmented Pioneer Braid Border (also known as Braid Border), followed by another very wide border of the white Tone-on-Tone. The augmentation of the Pioneer Braid Border was the addition of a very narrow flange of contrasting fabric. This project is a top only, as I haven't decided exactly what kind of quilting motif I want to do. I specifically made the borders wide so that I would be able to play around with some quilting motifs.
Update: November 2008. Yes: 2008 .. four years later! One reason this top remained unquilted is that I had no motivation to do so. The quilt is square (about 40" square). I have no freakin' idea why I did that ... I don't particularly LIKE square quilts. But it is square and that is that. I have been steadily working with Tin Lizzie, my 18" longarm quilting machine and this UFO top rose to the top of the list. The tops that I have been using have truly been "learning experiences", as I'm trying to do something new with Lizzie for each top. As a result, the *quality* of the quilting isn't so hot .... I could have definitely done better had I quilted them on my Janome. But practice with Lizze was the objective; high class quilting was not. (Not that I was intentionally doing sloppy quilting but my skill level with Lizzie isn't very good at this point!) For this quilt, I decided that I would do stitch in the ditch around the clamshells. I have heard that stitch in the ditch with longarms isn't easy, but I have been moderately successful with straight line stitch in the ditch using a straight edge ruler. So, WHY did I think that I could do CURVED stitch in the ditch without a curved ruler??? Just call me stupid. After I did the entire center *free hand* .. because I kept hoping that I'd get better at it ... I realized at the end that it was so horrible it shouldn't be allowed to exist. I couldn't re-do it then, as I didn't have a curved template. So, I moved onto the borders. The fancy augmented Pioneer Braid Border was left alone. I hadn't a clue what I could possibly do for a quilting motif on it, so I decided to do nothing. As a result, this border is slight "puffy" in relation to the other quilted borders ... but in retrospect, I think that looks kinda neat.
Heh .. even then, they aren't all exactly *straight* at times. I discovered that my straight edge ruler would skedaddle away from me, taking Lizzie's guideline & hence needle, with it. But .. it's "good enough" for now. It was a learning experience and I did learn the lesson (find a way to make the template/ruler more "sticky" or develope better handling control). But .. that center part needed to be addressed. I used the better part of an entire evening of TV watching to completely rip out everything I had stitched. Yes, it was just that bad. There are no pictures to show you (what? do you think I'm nuts?? don't answer that). Then, using a tip from a professional longarm quilter who lives nearby, I went to our plastics fabrication store (TAP plastics) and bought a 1/4" thick circle of the appropriate diameter of the clamshell. They always stock a supply of plastic circles of varying diameters, so this wasn't a custom order.
But, the top is now a quilt .. I can scratch another UFO off my list AND ... I have now recouped 9.6% of the cost of Lizzie! I'm so jazzed! :-) Once I start quilting my larger tops, that percentage will increase by leaps and bounds instead of the small increments that I've done so far. |
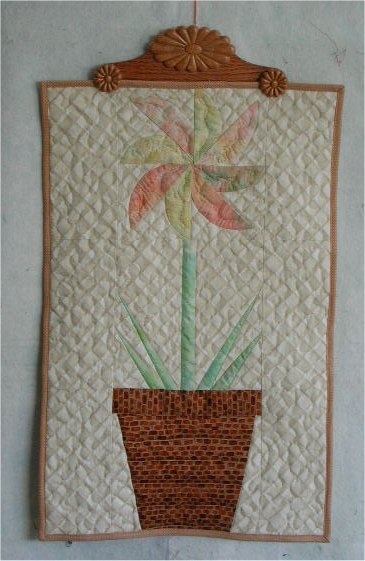
2. Curved pinwheel. The parts for this small wallhanging came from EQ5. The flower is the Black-eyed Susan block, the stems, leaves & flower pot were from one of the EQ5 libraries. The curved pinwheel (flower) is a real PITA to do ... man, I cussed a lot at this one! I also didn't make the contrast strong enough between the flower petals and the background, but didn't realize until I was completely done. The cross-hatching for the background quilting took *forever* to do and is really, really BORING. (But it looks nice) |
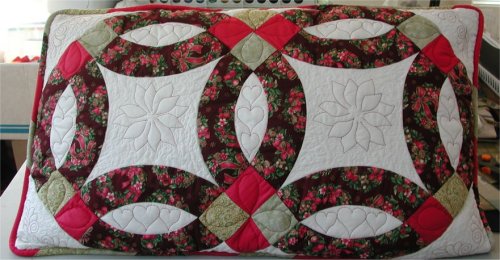
3. Double Wedding ring pillow sham. I cheated on this one. :-) I've made 2 pieced-arc Double Wedding Ring quilts and wanted to get this project done *fast*, so I cut the arcs from one piece of fabric. The rings are HUGE ... big enough so that I made an oversized, king pillow sham for my youngest DD. Actually, I didn't initally make it for her, but she recognized the fabric I used in the arcs as being leftover from a Christmas quilt she made for her grandfather. She assumed that I had made it for her [grin] Since it doesn't go with anything else in the house, it seemed reasonable that she could abscond with it. :-) I played around with different quilting motifs and used colored thread to make some of the motifs stand out. |
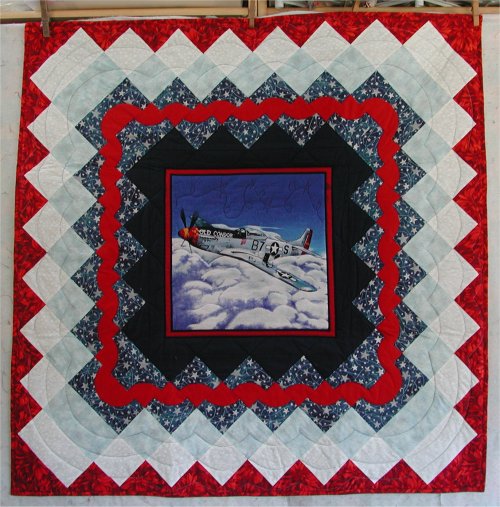
4. P51 Mustang (cheater panel) with Drunkard's Path border. This pre-printed panel is one of 2 that came as yardage from Joann's. I had used the other panel in a previous project and this one was just hanging around. Although I have never particularly liked the Drunkard's Path block, using it for this border (it's the inner red one) is the ONLY variation that I've thought was attractive. This application was taught to me by Laura Nownes in a class I took to make her Star of Bethlehem (Lone Star) quilt .. which I am estatic to say is finally finished as of March 2006!! woo hoo! :-) |
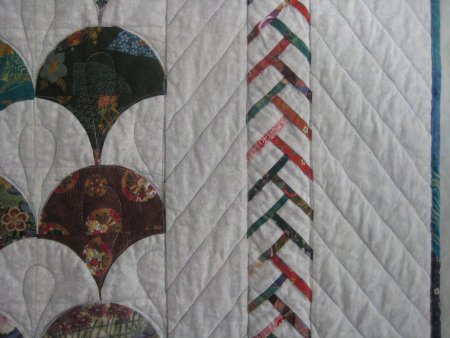 Furthermore, I wasn't feeling especially creative that day (but did want to finish quilting it), so some straight line quilting, which would extend the lines of the Prairie Border, was what was going onto the plain fabric borders. It was during this quilting that I discovered I wasn't exactly precise when I was making the Pioneer Braid Border because, if I simply extended the lines of that border onto the plain borders, they were not the same distance apart. This upset my sensibilities. If I made the straight qulting lines equi-distant apart, they wouldn't line up with the Pioneer Braid Border. Oh! the dilema! I finally decided that equi-distant quilting lines would look better than being consistent with the border lines ... so that's what I did.
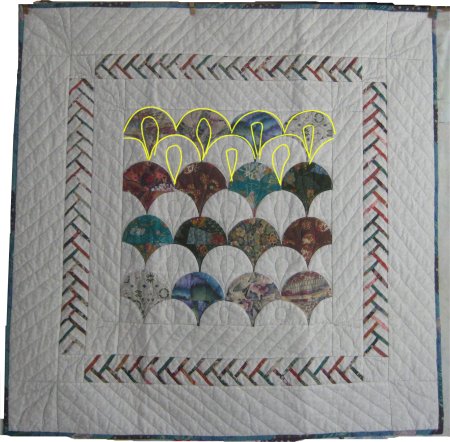 Using this circle as a template, I then stitched around each clamshell. The stitching was better, but not perfect. I know realize that I need some sort of extended base for the bed of Lizzie to provide a larger surface to put the templates on. When the template extends over the edge of Lizzie's base, it tips ... and then I don't have an edge to sew against. Again .. another learning experience. :-)